Beeswax finish for wooden toys: a step-by-step application guide
Commercial wooden toys rarely arrive with the finish they deserve. Walk through any big-box store and the bins of painted pine and beech blocks carry a faint chemical edge — the residue of lacquers…
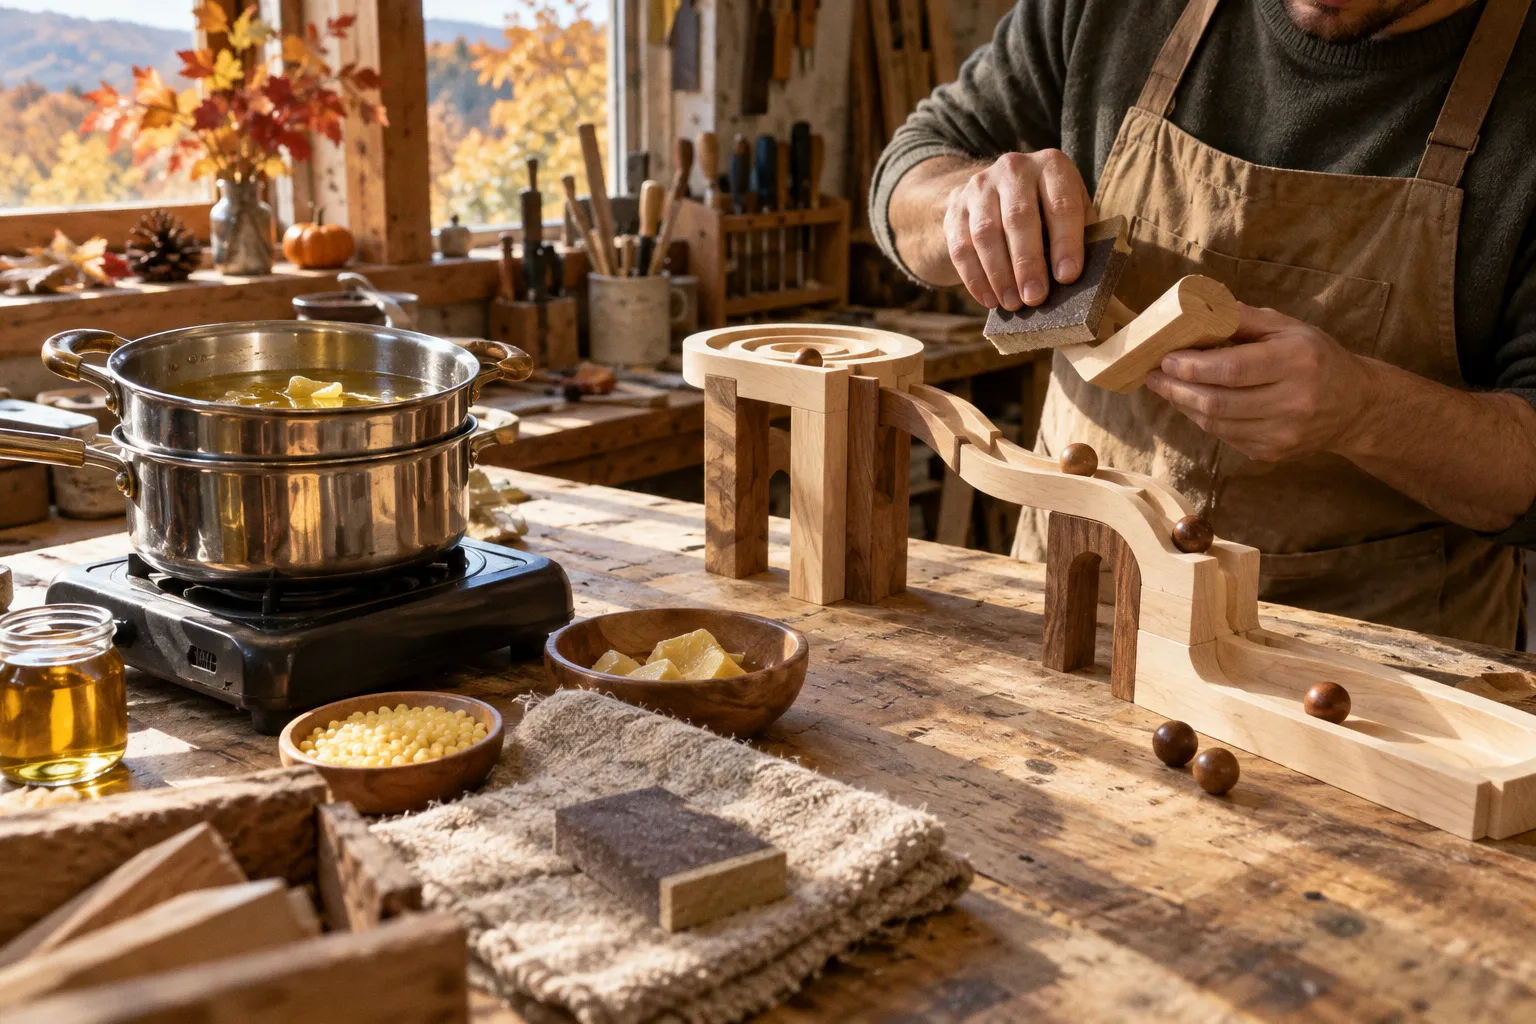
Commercial wooden toys rarely arrive with the finish they deserve. Walk through any big-box store and the bins of painted pine and beech blocks carry a faint chemical edge — the residue of lacquers, varnishes, and polyurethane sealants chosen because they dry fast on a factory line, not because they belong in a child’s mouth. A beeswax finish is the counter-argument: a simple, low-toxicity coating made from natural wax and a suitable carrier oil. It is also one of the few finishes a careful parent or craftsperson can mix and apply at home without specialized equipment.
The catch is that beeswax formulations are not interchangeable. The difference between an heirloom-grade finish and a sticky, rancid mess comes down to ingredient selection, proportions, surface preparation, and technique. A good finish should disappear into the life of the toy: it should feel smooth in the hand, resist ordinary moisture, and be easy to renew when handling begins to dull the wood.
A proper beeswax finish is not just a surface treatment — it is a material substitution. You are replacing a polymer sealant with a simpler finish, and that demands respect for both the timber and the wax.
Selecting the Right Ingredients for Toy-Safe Sealants
Every component of a beeswax finish ends up on a child’s hands, and often near a child’s mouth, so ingredient integrity is non-negotiable. The two functional ingredients — wax and carrier oil — each bring their own quality considerations.
Choosing the beeswax
Use pure, unbleached beeswax pellets or pastilles from a supplier that discloses how the wax has been processed. Cosmetic-grade beeswax can be suitable, provided it is genuinely pure and free from added fragrance, colorants, stearin, or paraffin. Candle wax with added hardeners is not an appropriate substitute.
Pellets are easier to work with than a solid block because they melt evenly and make measuring more consistent. If you are starting with a block, shave it into small pieces before weighing or measuring. Avoid wax with a strong smoky, perfumed, or chemical odor. Beeswax naturally varies in color from pale yellow to a deeper golden tone, but the color itself is not the main quality test. Purity and the absence of additives matter more.
Choosing the carrier oil
The oil carries the melted wax across the wood grain and remains in the timber after the finish has cooled. Its resistance to oxidation therefore affects both the useful life of the finish and the way the toy smells over time.
| Oil type | Food-safe when properly sourced | Stability | Suitable use |
|---|---|---|---|
| Food-grade mineral oil | Yes | Very stable and resistant to oxidation | Blocks, teethers, cutting-board-style toys, and frequently handled pieces |
| Jojoba oil | Yes | Highly stable; technically a liquid wax | General-purpose toy finish and heirloom pieces |
| Fractionated coconut oil | Yes | More stable than ordinary coconut oil | Light-colored woods and smaller maintenance batches |
| Hemp seed oil | Yes | Can harden as it cures, but is more oxidation-sensitive | Pieces that benefit from a harder cured film |
| Walnut oil | Yes, when properly processed | Can cure inside the wood, but introduces nut-allergen concerns | Decorative pieces only, and not for nut-allergic households |
| Unrefined olive oil | Yes as a food, but less suitable for a durable finish | More prone to oxidation than stable mineral or wax-based oils | Best avoided for long-term toy finishing |
For toys, food-grade mineral oil and jojoba oil are usually the least troublesome choices. Mineral oil is especially practical for objects that will be handled by infants because it is stable and does not cure into a hard film. Jojoba oil produces a pleasant, less greasy blend and is well suited to pieces where long-term storage stability matters.
A drying plant oil can also be useful, but it changes the character of the finish. Oils such as hemp or walnut may polymerize inside the wood rather than remaining entirely fluid. That can produce a harder surface, but it also means a longer curing period and greater sensitivity to storage conditions before the oil has been used.
Finding a workable proportion
A common starting range is between 1:1 and 1:4 beeswax to oil by volume.
- A 1:1 blend produces a firm, paste-like balm. It is useful for small, heavily handled pieces and for filling a cloth without the mixture running.
- A 1:2 or 1:3 blend is a practical middle ground for blocks, rattles, stacking toys, and general maintenance.
- A 1:4 blend is softer and easier to spread across larger surfaces such as train tables, dollhouse floors, or broad wooden panels.
The softer the blend, the easier it is to apply in a thin coat. The harder the blend, the more rubbing it may require before it becomes workable. There is no universal best ratio: wood species, room temperature, surface condition, and the chosen oil all affect how the mixture behaves.
Any oil that has not been stabilized can eventually develop rancid odors, either in the tin or after being absorbed into the wood. The speed of that change depends on the oil’s freshness, its fatty-acid profile, exposure to heat and light, and how well the container is sealed. For that reason, do not judge an oil only by how well it spreads on the day you mix it. Choose a stable oil for toys that will be stored or passed between children, and make small batches when working with more oxidation-sensitive plant oils.
Surface Preparation: Sanding and Cleaning Techniques
Beeswax finishes reward smooth timber. They do not fill gaps, hide deep scratches, or compensate for uneven sanding in the way a thick film finish can. The surface beneath the wax determines the final result.
Sanding new or unfinished wood
For new toys or freshly cut timber, work through a progression such as 180-grit, then 220-grit, finishing around 320-grit for the final pass. Sand with the grain and keep the pressure even, particularly on edges and rounded parts.
Stopping too early leaves visible sanding marks beneath the finish. Going excessively fine can burnish the surface and reduce the tooth that helps a wax-and-oil blend settle into the fibers. A smooth, properly sanded surface should feel uniform when you run a clean hand over it, with no sharp corners or raised splinters.
If the toy is made from several joined pieces, pay attention to transitions between them. A wax finish will emphasize a ridge that can be felt but not easily seen. Round over sharp edges lightly rather than trying to force a heavy coat of wax into them later.
Working on a factory-finished toy
A factory-lacquered or painted toy requires a different approach. Wax will not reliably bond to a glossy coating, and it cannot turn an unknown existing finish into a safer one. If the purpose of refinishing is to remove an old coating, the original finish needs to be taken off thoroughly and safely rather than covered with wax.
On a small repair area, sand only as far as necessary to remove the damaged coating and feather the edge into the surrounding surface. On a full refinish, begin with a suitable coarser grit and move gradually to finer grits. The exact starting point depends on the thickness and hardness of the existing coating, so avoid removing more wood than necessary.
Spot treatment on toys already in circulation
For rough spots, raised grain, and small splinters, 320-grit sandpaper is usually sufficient. Sand by hand rather than with a power sander. A power tool can remove material too quickly from a small block, reshape a rounded edge, or flatten a detail that gives the toy its character.
Inspect corners, holes, grooves, and carved numerals with particular care. These areas collect grime and can hold loose fibers. If a splinter cannot be removed cleanly with light sanding, the toy may need more substantial repair before it is returned to play.
Cleaning before waxing
After sanding, remove dust with a slightly damp, lint-free cloth. Do not soak the toy. The aim is to lift dust from the pores without driving water into joints or end grain.
Let the wood dry completely before applying the finish. Dust sealed beneath wax creates a rough texture that buffing cannot correct, while residual moisture can cloud the coating and interfere with absorption. Indoor drying time varies with the wood, the size of the piece, and the humidity of the room. Dense hardwoods and end grain may need considerably longer than a thin pine component.
Do not use a fragranced household cleaner as a shortcut. A cleaner may leave surfactants, oils, or other residues that change how the wax spreads. For most unfinished wooden toys, careful sanding followed by a clean, lightly damp cloth is enough.
Formulating and Melting Your Natural Wax Blend
The melting stage is where many first-time finishers go wrong — either by overheating the wax or by allowing water into the blend. Beeswax melts at roughly 145–150°F (about 63–65°C). It does not need to be heated far beyond that range to become workable.
The double-boiler method
A double boiler gives the most control. Set a heat-safe glass or stainless-steel bowl over a saucepan containing gently simmering water. The bottom of the bowl should not sit directly in the water.
1. Measure the beeswax and place it in the bowl.
2. Heat gently, stirring occasionally as the pieces soften.
3. Add the carrier oil once the wax is fully or nearly liquid.
4. Stir until the blend is uniform and no wax particles remain.
5. Remove the bowl from the heat before pouring.
Keep water out of the mixture. Even a small amount can cause splattering while the blend is hot and may contribute to a grainy or uneven texture as it cools. Use dry tools, dry containers, and a work surface that is not exposed to steam.
The mixture may look cloudy immediately after the oil is added. That is not necessarily a problem; continued stirring and gentle heat should produce a more even liquid. If the blend begins to smoke, darken sharply, or smell scorched, it has been overheated and should not be used on a child’s toy.
The microwave method
A microwave can work for very small batches, but it is less forgiving because wax heats unevenly. Use a microwave-safe container and low power. Heat in short intervals, stirring thoroughly between them, until the wax is melted. Add the oil and warm the mixture only enough to combine it.
Do not leave the container unattended. Full power can create hot spots even when the surface appears calm, and a container that feels manageable on the outside may hold dangerously hot wax inside. A double boiler remains the better choice when consistency matters or when preparing more than a small maintenance batch.
Pouring and cooling
Pour the liquid blend into a clean, dry, wide-mouthed metal tin or glass jar. A wide opening makes it easier to load a cloth once the mixture has cooled to a soft solid. Label the container with the ingredients and the date of preparation, particularly if you make several blends with different oils.
Allow the tin to cool undisturbed at room temperature. Rapid chilling can encourage cracking, separation, or a rough texture. If the surface develops a pale, chalky bloom as it cools or sits, that may simply be wax crystallization rather than spoilage. The bloom can usually be softened or removed during application and buffing. Still, a bloom should not be used to dismiss other warning signs: an unpleasant old-oil smell, visible mold, unexpected liquid separation, or a texture that has changed dramatically suggests that the batch should be discarded.
Storage is not a promise of indefinite shelf life. A blend made with mineral oil or jojoba oil will generally be more storage-stable than one made with an unstabilized vegetable oil, but even a stable blend should be protected from heat, direct light, and contamination. Keep the tin tightly closed in a cool, dry place and check its smell and appearance before use. If it smells rancid, sour, paint-like, or noticeably different from the fresh mixture, do not apply it to a toy.
Making a smaller batch is often the safest form of storage planning. It is better to mix enough for the current project and a modest amount of maintenance than to keep a large tin for years simply because the ingredients once appeared stable.
Application Methods for an Even, Non-Tacky Coating
Application is the most forgiving stage of the process, but the most common failure mode — a tacky, fingerprint-prone finish — is also the easiest to avoid. The central rule is simple: use less wax than you think you need.
Set up the work
Apply the finish in a dry, comfortable room at moderate room temperature. Very cold wood can make the wax drag across the surface, while excessive humidity may slow drying and introduce moisture into an open tin.
Cover the work surface with a clean towel. It protects the toy from knocks and gives you enough grip to rotate small pieces without squeezing them too hard. Keep a second clean cloth nearby for buffing. Mixing the application cloth and the buffing cloth is a common way to spread excess wax back over an otherwise finished surface.
Apply a thin coat
Scoop a small amount of wax with a lint-free cotton cloth. An old cotton T-shirt cut into squares works well; paper towels tend to shed fibers and can break apart in carved details. For a very small toy, a fingertip can also be useful, provided the wax is soft and the hands are clean.
Rub the finish into the wood with small circular motions, then follow the grain to even out the coat. Work in sections and keep the layer thin. The goal is to wet the surface lightly, not to leave a visible layer sitting on top.
A heavy coat is the direct route to stickiness. It may look glossy at first, but the excess has nowhere to go. It remains on the surface, collects dust, and transfers to hands. If the cloth begins to drag, pick up a smaller amount rather than pressing harder.
Treat end grain and details separately
End grain — the open fibers visible at the cut ends of blocks — absorbs more readily than face grain. It may need a second light pass after the first coat has settled. Do not flood the end grain, especially near glued joints, holes, or narrow slots where excess oil can remain trapped.
Corners and carved details benefit from a fingertip or a small folded section of cloth. The treads on a wooden train, numerals on counting blocks, and the rim of a stacking ring all need enough friction to work the wax into the recesses. After application, inspect those areas for visible buildup. Detail is attractive; a pocket of soft wax is not.
Allow time for absorption
Once the toy is coated, set it aside so the wood can absorb what it can. The appropriate interval depends on the oil, the wood, the temperature, and how much finish was applied. A short rest is often enough for a thin maintenance coat, while dry or old timber may benefit from a longer interval.
The surface gives useful feedback. A properly absorbed coat begins to look matte or satin rather than wet and glossy. If the wax still smears under a light touch, there is too much material on the surface or it needs more time before buffing. Do not add another coat while the first remains soft and mobile.
The best beeswax finish is almost invisible in use. If the toy feels coated rather than wooden, the application has gone too far.
Buffing and Curing: Achieving a Professional Heirloom Finish
Buffing is the step that separates a homemade finish from a professional one. A surface that has been waxed but not buffed feels greasy, picks up fingerprints, and shows every smear. A properly buffed surface feels nearly silky and lets the grain remain the visual focus.
Buff along the grain
Use a clean, dry cloth and work along the wood grain. This is not a polite wipe. Pressure and repetition matter because friction warms the residual wax just enough to redistribute it into the pores while lifting excess material from the surface.
A soft cotton cloth works well, and a microfiber cloth can also be effective if it is clean and free from detergent residue. Buff until the surface no longer feels tacky and the cloth glides across it without snagging. Turn the cloth frequently so you are not rubbing with a section already saturated with wax.
If the toy remains sticky, do not immediately apply solvent or another layer of finish. Begin with more dry buffing. If that does not help, use a clean cloth to remove as much excess as possible and allow the toy more time to settle before trying again.
Understand curing
A toy may feel dry after buffing while the oil-and-wax blend is still settling inside the wood. Stable, non-drying oils may remain relatively soft, while drying oils can continue to polymerize over a longer period. The practical curing period therefore depends on the formulation rather than on a single universal schedule.
During this time, avoid soaking the toy, submerging it, or leaving it in direct sunlight. Heat can soften the wax and cause uneven patches; water can penetrate end grain and joints before the finish has stabilized. Keep the toy in a clean, ventilated place and handle it lightly until the surface feels dry and consistent.
For toys intended for babies or toddlers, be conservative. A finish that seems acceptable to an adult hand may still transfer if it has not settled fully. The surface should be dry, non-tacky, and free from a strong oil odor before the toy goes back into close-contact play.
Long-Term Lifecycle: Honest Limits and Honest Maintenance
A beeswax finish is one of the more straightforward treatments available for wooden toys, and that simplicity is part of its appeal. It brings out the depth of the grain, leaves a pleasant tactile surface, and offers some protection against the minor moisture contact that comes from damp hands, drool, and ordinary wipe-downs. It is also easy to renew without stripping the entire toy back to bare wood.
What it does not do is make a wooden toy permanently waterproof. A waxed block left in a puddle, used as a bath toy, or stored in a persistently humid environment will eventually absorb moisture. The wax may slow that process, but it cannot replace a waterproof construction or change the behavior of the wood. For regular water play, a different material choice is usually more sensible than adding thicker coats.
Cleaning should remain gentle. Wipe the toy with a barely damp cloth when necessary and dry it promptly. Avoid prolonged soaking, abrasive cleaners, and dishwasher heat. If grime has accumulated in a groove, clean the area carefully and allow the wood to dry fully before applying maintenance wax.
Maintenance is most effective when the coat is renewed before the wood becomes visibly dry or rough. Heavily handled pieces — teethers, grasping toys, and frequently dropped blocks — may need attention more often than decorative toys that spend most of their time on a shelf. Apply a thin coat using the same method as before, then allow it to absorb and buff away every trace of surface excess.
Before reapplying, inspect the toy itself. Wax is not a repair for loose joints, deep cracks, splinters, or damaged paint. Remove the toy from play if the wood has become structurally unsafe, and repair the underlying problem before refinishing.
The strongest argument for a beeswax finish is not that it lasts forever. It is that the finish can be understood, renewed, and maintained without turning the toy into a disposable object. The wood will change as it is handled. Small marks will appear, the grain will deepen, and the surface will acquire the evidence of use. A sensible wax blend supports that process rather than trying to seal it away.
A well-prepared wooden toy does not need an elaborate coating. It needs clean timber, a stable and appropriate oil, pure beeswax, a thin application, and enough patience to remove the excess. Get those decisions right, and the result is not a plastic-like shell but a quiet, durable surface that still feels like wood — which is exactly what a wooden toy should feel like.