Toddler Rhythm Sticks: Step-by-Step Musical Activities
Most “musical instruments” marketed to children under three arrive wrapped in glossy plastic, molded from polymers that will remain in the waste stream long after the child has moved on to another kind of play. Rhythm sticks are a useful exception.
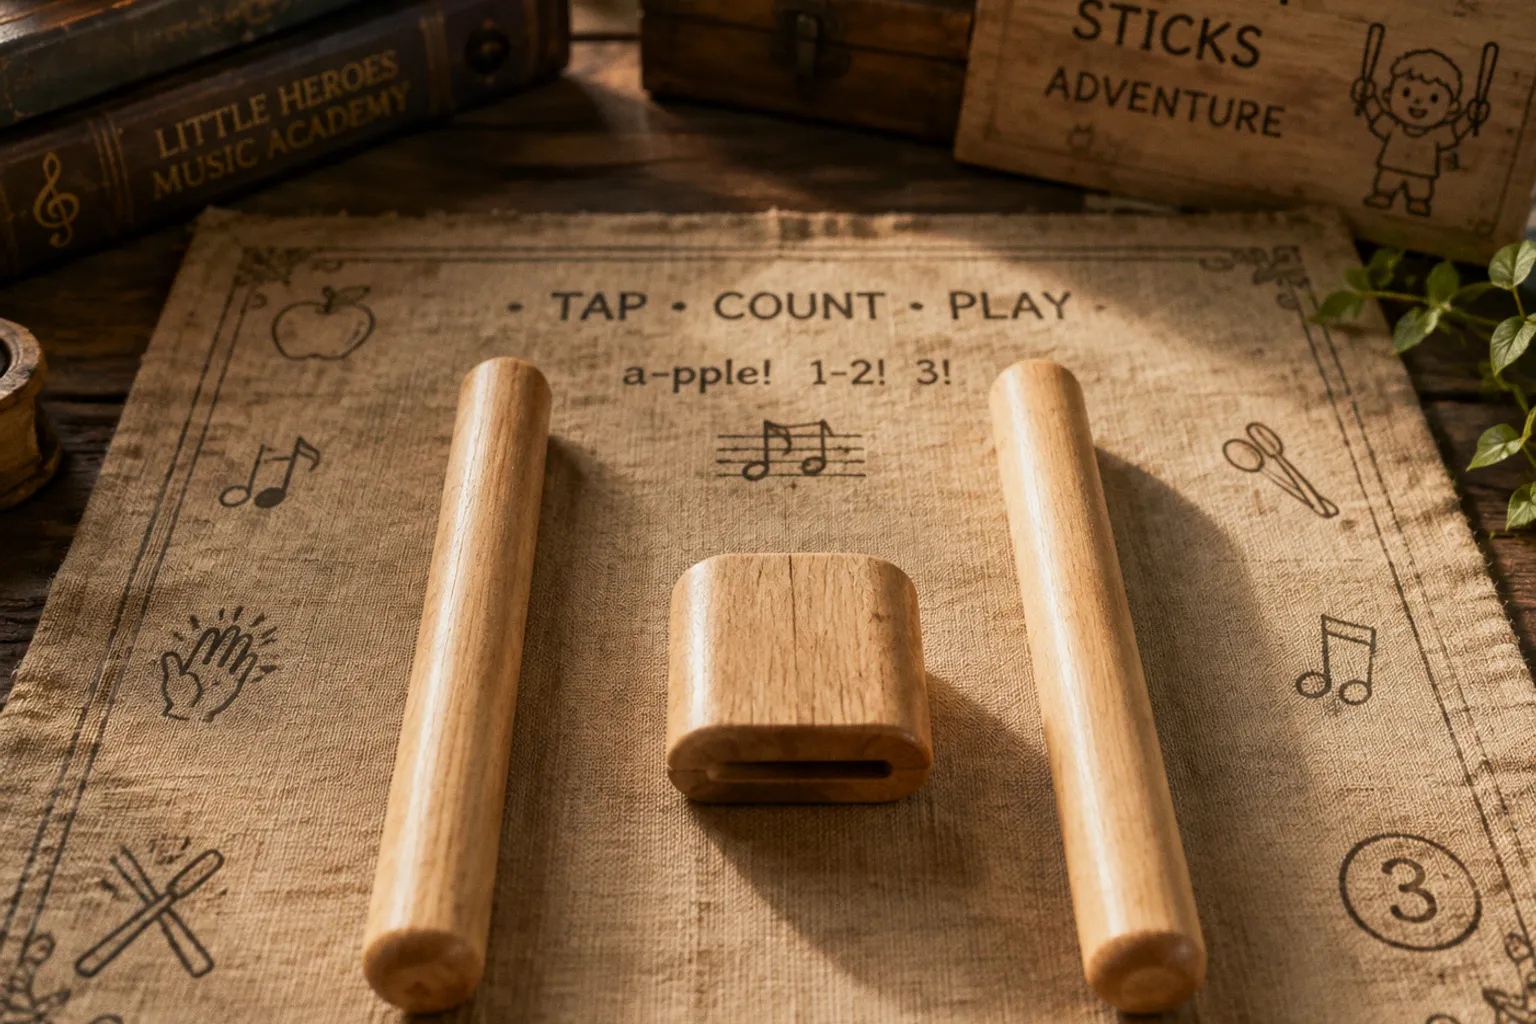
Known in formal music education as claves, they are simple wooden percussion instruments: two solid sticks, shaped to sit in a small hand and struck together or against another surface.
Their appeal is not that wood is automatically safer or more educational than every other material. It is that a well-made wooden stick gives a child direct feedback. The hand feels the grain and weight. The ear hears the difference between a light tap and a hard strike. The child can see exactly where the sound comes from, without buttons, batteries, flashing lights, or an electronic track telling them when to participate.
That simplicity makes wooden rhythm sticks especially effective for toddler rhythm sticks activities at home. They can support turn-taking, listening, counting, movement, and early sound play with almost no equipment. But the material and shape still matter. A stick that is too long, too thin, poorly finished, or too loud can turn an inviting activity into a frustrating one.
A rhythm stick is not automatically appropriate just because it is made of wood. It should be solid, smooth, free of loose coating, sized for the child’s hand, and used with an adult nearby.
The useful part of a rhythm stick is not its resemblance to a “real” instrument. It is the clear connection between a child’s movement and the sound that follows.
Choosing the Right Percussion: Lummi Sticks vs. Standard Claves
The most consequential choice in this category has little to do with color. It comes down to length, diameter, weight, finish, and the amount of control a child can reasonably manage.
Rhythm sticks are sold under several names. Lummi sticks are generally shorter and thicker, with a shape that is easier for a young child to hold in the whole hand. Standard claves are often longer and slimmer. Neither design is universally better. The right option depends on the child’s size, coordination, the intended setting, and whether the sticks will be used mainly for tapping together or for striking other surfaces.
| Parameter | Lummi sticks | Standard claves |
|---|---|---|
| Shape | Usually shorter and thicker | Usually longer and slimmer |
| Grip | Suits a full-palm toddler grasp | Requires more control as the stick length increases |
| Sound | Often a lower, softer click or knock | Can produce a sharper, more projecting click |
| Best use | Early exploration, seated games, simple patterns | More controlled preschool play and group music |
| Common difficulty | May feel bulky to an older child | Can rotate or slip in a young child’s hand |
| What to check | Weight and diameter | Length, balance, and striking force |
The label “toddler” is not enough to settle the decision. Look at the actual dimensions and construction. A small child may manage a longer stick if it is light and easy to grasp, while another child may need a shorter pair for much longer. Children differ in hand strength, attention, motor planning, and tolerance for unfamiliar sounds.
The stick should not extend so far that the child can easily swing it into another person’s face or lose control of the end. It should also be substantial enough to resist snapping, but not so heavy that a short activity becomes tiring. If the child has to squeeze hard to keep hold of it, the stick is working against the activity.
For very young children, a full-palm grip is usually the natural starting point. There is no need to insist on a formal percussion grip. Let the child explore holding one stick, tapping it on the floor, or passing it from one hand to the other before expecting a coordinated two-stick pattern.
What to inspect before the first session
A careful inspection takes less time than dealing with a splinter or a broken piece of wood later. Check that:
- The sticks are made from solid wood rather than a hollow shell or a fiberboard core.
- The ends are rounded or smoothly finished, with no sharp corners.
- There are no cracks, raised fibers, dents, or rough patches along the shaft.
- The finish is intact and does not flake when rubbed with a dry cloth.
- There is no strong solvent smell when the package is opened.
- The pair is not so light that it feels flimsy or so heavy that the child cannot control it.
- The product information gives clear guidance about age range and materials.
“Non-toxic” is not a complete description of quality. It may refer to the coating, while saying nothing about splintering, construction, or whether the surface is suitable for frequent handling. A natural finish is not automatically risk-free either. Any wooden instrument should be inspected regularly, particularly when a toddler is still inclined to mouth objects.
There is also a practical difference between a stick intended for a classroom and one intended for a home with a young child. Classroom instruments may be designed to project across a room and withstand frequent group use. At home, a quieter pair may be more useful. The sound should be distinct enough to hear without encouraging the child to strike every surface at maximum force.
The Material Question: Wood, Finish, and Everyday Safety
Wooden rhythm sticks are often described in overly romantic terms: natural, timeless, sustainable, safe. The more useful approach is less absolute. Wood can be an excellent material for this kind of instrument, but its quality depends on how it has been cut, sanded, finished, stored, and maintained.
Maple, beech, birch, and other hardwoods are common choices. A solid piece of hardwood usually provides a more consistent feel than a laminated or hollow construction. That does not mean every solid stick is well made, or that every laminated product will fail. It means the construction should be visible in the product description and easy to assess in person.
Look for a surface that feels smooth without feeling heavily coated. The stick should still feel like wood under the thumb rather than like a glossy plastic cylinder. Possible finishes include a well-cured oil, a wax blend, or a suitable shellac. Some products are left unfinished and carefully burnished. The important question is whether the surface stays intact during ordinary handling.
Avoid sticks with:
- Flaking paint or decorative film;
- Unidentified glossy coatings;
- Roughly cut ends;
- Deep dents that can collect dirt or moisture;
- Splits running along the grain;
- Strong chemical odor;
- Small attached decorations that can come loose.
A child will often test a new object with their mouth, even when the object is introduced as an instrument. That is one reason to avoid treating rhythm sticks as completely independent play equipment for a young toddler. An adult should remain close, especially during the first sessions and whenever the sticks are being used around younger siblings.
Wood also changes with use. A dry room, damp hands, repeated impacts, and storage in a toy bin all affect the surface differently. Wipe the sticks with a slightly damp cloth when needed and let them dry fully. Do not soak them, put them in a dishwasher, or use strong household cleaners unless the maker specifically allows it. If a crack or splinter appears, remove the pair from play rather than sanding it casually while the child waits beside you.
Grain orientation is worth noticing, although it is not something a child needs to learn. A stick cut along its length generally handles impact better than a piece cut across the grain. The ends deserve particular attention because repeated strikes can expose weak fibers there first.
The same principles apply when choosing wooden rhythm sticks for toddlers as when choosing blocks or wooden stacking toys: construction matters more than a natural-material slogan. A plain, carefully finished pair is preferable to a decorated pair whose surface is difficult to inspect.
Building Motor Skills Through Rhythmic Tapping Patterns
The first activities should be short and easy to copy. The aim is not to produce a polished rhythm. It is to help the child notice that a movement can be repeated, paused, changed, and shared with another person.
Begin on the floor or at a low table. Remove nearby breakable objects and choose a surface that will not make the sound painfully loud. A carpet reduces the echo; a wooden floor gives a clearer response but may encourage harder striking. If the room becomes noisy, change the surface before asking the child to tap more quietly.
Step 1 — Tap and pause
Hold the sticks where the child can see them. Tap once, then keep both hands still. After a moment, tap again.
Do not turn the pause into a test. The child may join late, tap during the pause, or abandon the pattern altogether. That is part of the first exploration. You are introducing contrast: sound and silence, movement and stillness.
Once the child begins to watch, offer one stick at a time. Let them copy a single tap before giving them the pair. Some toddlers will prefer to tap a stick on the floor rather than strike two sticks together. That is still useful. It builds a connection between force, position, and sound.
Step 2 — Alternate hands
Place a cushion, carpet square, or folded towel in front of the child. Tap the surface with one hand, then the other:
1. Right hand.
2. Left hand.
3. Right hand.
4. Left hand.
Use a slow pace. The point is not speed but alternation. If the child switches hands randomly, follow their pattern and then return to your own. Demonstration works better than repeated correction.
This activity gives the child practice with bilateral coordination: both sides of the body take part, but they do not perform exactly the same action at exactly the same moment. It also introduces a simple anticipation pattern. After several repetitions, the child may begin to prepare the next hand before the next tap.
Step 3 — Knee, stick, knee, stick
Tap the right knee with the right stick, bring the sticks together, then tap the left knee with the left stick and bring them together again. Keep the pattern compact:
- Knee;
- Together;
- Knee;
- Together.
Children do not need to reproduce the sequence perfectly. They may tap both knees, tap the floor instead, or make up a new order. Follow their variation for a few turns and then return to the original sequence. This keeps the activity collaborative rather than turning it into an exercise in obedience.
Step 4 — Explore surfaces
Offer one or two safe surfaces with clearly different sounds. A wooden block produces one kind of knock; a carpet produces a muted sound; a sturdy metal bowl creates a brighter tone but should be used carefully and at low force.
Let the child compare rather than simply strike everything nearby. You can say “soft,” “loud,” “high,” or “low” without expecting a formal answer. If the sound becomes too sharp, move back to the floor or a padded surface.
Avoid glass, thin ceramic, unstable furniture, and anything with a sharp edge. A hardcover book can work as a quiet target, but it should be one that you do not mind being marked. The instrument does not need a special stand or a collection of props. A towel, cushion, wooden block, and open floor are enough for several sessions.
Step 5 — Copy a tiny pattern
Use patterns that fit in one breath:
- Tap, tap, pause.
- Tap, pause, tap.
- Tap, tap, tap.
- Tap on the floor, tap in the air.
Demonstrate once and invite the child to try. If the pattern is too difficult, reduce it to one sound followed by a pause. A successful one-sound exchange is more valuable than a long sequence that the child cannot follow.
These are the building blocks of simple rhythm stick games for preschoolers, but they work best when introduced without rushing toward preschool-level performance. A toddler may spend several sessions on the same two-beat pattern. Repetition is not a failure here; it is how the pattern becomes familiar.
Phonics and Syllable Games: Tapping Out Words and Numbers
Rhythm sticks can make language more physical, but their role should be described carefully. Tapping syllables gives children a playful way to notice parts of spoken words. It does not guarantee later reading success, and it does not replace conversation, shared books, songs, or other language experiences.
The easiest starting point is a word the child already knows. Say the word naturally, then repeat it slowly while tapping once for each spoken part:
- “Ap-ple” — two taps.
- “Ba-na-na” — three taps.
- “Car” — one tap.
Some children will hear the divisions immediately; others will tap once for the whole word. Do not force an exact answer. Stretching the word slightly, exaggerating the rhythm, or singing it can make the structure easier to notice.
A gentle progression at home
1. Start with names. Tap the child’s name, a parent’s name, or the name of a familiar pet. Names are motivating because the child already cares about the words.
2. Use familiar objects. Choose food, animals, toys, and clothing. Keep the number of words small enough that the activity still feels like a game.
3. Compare short and long words. Tap “dog,” then “dinosaur.” Ask which one had more taps, without requiring the child to use technical language.
4. Add numbers. Say “one” and tap once; say “two” and tap twice. Later, place two blocks in front of the child and match the taps to the objects.
5. Play with rhyme. Tap “cat,” “hat,” and “mat.” The number of taps remains the same while the beginning sound changes. This helps separate the rhythm of a word from its individual sounds.
For a child who is not yet speaking much, use animal sounds, claps, or the rhythm of a familiar song. The child can tap while the adult supplies the words. This keeps the activity accessible without turning it into a language assessment.
It is also useful to distinguish syllable tapping from phoneme work. A toddler may be able to hear that “banana” has several parts without being ready to isolate every individual sound. That is normal. Keep the focus on listening and participation rather than on getting a precise linguistic answer.
Numbers offer another route into the activity. Tap a pattern and ask the child to bring the same number of blocks. Or place three blocks in a row and tap once for each block while touching them. The rhythm does not teach cardinality by itself, but it can give counting a clear physical structure.
Tapping words is most useful when it remains language play: hear the word, feel its parts, and enjoy saying it again.
Developing Impulse Control with Tempo and Waltz Beats
Rhythm activities naturally create moments when a child has to wait, listen, and respond. That does not mean a pair of sticks can instantly teach self-control. It means the adult can use sound and silence to practise these actions in a concrete, low-pressure way.
A three-beat pattern is a good option because it is easy to feel:
Tap, tap, tap — pause.
Say the pattern aloud as you play it. Then invite the child to join. If three taps are too much, use one tap followed by a pause. If the child keeps going during the pause, turn the mistake into the next round rather than interrupting to correct it.
Tempo games for home
- Follow my speed. Begin slowly. Once the child is comfortable, make the pattern a little faster, then return to slow. The change should be noticeable but manageable.
- Start and stop. Tap while a song plays or while you hum. Stop your hands when the sound stops. The child can copy you without needing to remember a separate instruction.
- Freeze on silence. Tap while walking or marching, then freeze when the tapping ends. This transfers the idea of a pause from hands to the whole body.
- Take turns leading. The adult makes a very short pattern; the child answers with any pattern they choose. There is no need to reproduce it exactly.
- Quiet and loud. Use a soft tap and a firm tap, staying within a comfortable volume. Talk about the difference without treating “loud” as the better answer.
- Pass the beat. Tap twice, pass the sticks to the adult, and wait for the next turn. This works best once the child understands that the instrument will come back.
The familiar waltz feel can be introduced through movement rather than formal music vocabulary. Walk in a circle for three steps, pause, and begin again. Tap three times, pause, and then change direction. The child experiences tempo as a change in bodily pace, not just as an instruction to hit faster.
Do not use surprise changes that startle the child or make them swing the sticks unpredictably. Tempo should change within the child’s control. If the activity becomes frantic, put one stick away and return to a simple tap-and-pause exchange.
Introducing musical instruments to toddlers works best when the adult models restraint. A child learns as much from seeing a pause as from hearing a beat. Wait for eye contact, give one clear cue, and allow enough time for the child to respond. Repeating the instruction several times can add pressure without adding clarity.
These games can also support ordinary household routines. Tap slowly while putting toys away, use a short pattern before washing hands, or play a stop-and-go game before leaving the house. The rhythm does not need to be labelled as an executive-function exercise. It is simply a structured way to practise listening, starting, stopping, and taking turns.
DIY Alternatives: Using Household Items for Musical Exploration
A dedicated pair is not required for a child’s first experiment with rhythm. Household objects can show whether the child enjoys tapping, copying, and comparing sounds before a family buys a purpose-made instrument.
The safest substitutes are large, sturdy, and easy to inspect. Wooden spoons can work, although they are heavier and often louder than rhythm sticks. Solid wooden blocks create a softer, less resonant sound. Smooth, unfinished dowels can be suitable when they have been cut and sanded properly, but the preparation needs to be done by an adult.
Wooden chopsticks are less ideal than they first appear. They may be tapered, brittle, or rough at the narrow end. If used at all, they should be checked closely and handled by an adult during preparation. Do not hand a toddler an improvised pair simply because the material is wood.
Useful alternatives include:
- Wooden spoons: good for outdoor tapping or large, slow movements; too heavy for some young children.
- Solid wooden blocks: quieter and easier to grip; useful for matching one sound to one object.
- Smooth wooden dowels: close in shape to a manufactured stick, but only after careful sanding and inspection.
- A sturdy cardboard tube: suitable for gentle tapping on a carpet, provided it is large, intact, and not being chewed.
- A padded container: a box or fabric-covered bin can provide a soft target for experimenting with force.
Household substitutions should not be treated as equivalent to a tested children’s instrument. Their dimensions, coatings, and break resistance may be unknown. Avoid objects with loose paint, staples, splinters, narrow detachable parts, sharp edges, or a finish that has not been identified.
Metal utensils are usually too loud for indoor toddler play and can have sharp edges. Glass and thin ceramics can break. Plastic-handled tools may contain seams or coatings that deteriorate under repeated impact. Bamboo products can be laminated, so the word “bamboo” does not by itself describe how the object will behave.
A simple sound basket can be assembled without buying anything new: one wooden spoon, one block, a folded towel, and an empty cardboard box. The child can tap each item, compare the sound, and decide which one they prefer. Use one object at a time if the child is likely to swing several at once.
The DIY stage is also a useful observation period. Does the child look toward the sound? Do they repeat a movement? Do they pause when the adult pauses? Do they prefer tapping a surface to tapping two objects together? These observations tell you more about the child’s interests than a product description promising advanced development.
Making the Activity Work in Real Homes
The best rhythm activity is the one that fits the room, the child, and the adult’s available attention. There is no benefit in planning a complicated music lesson if the sticks are going to be used for thirty seconds before everyone becomes irritated.
Keep the first sessions brief. End while the child is still interested, rather than waiting for complete loss of attention. A child may return to the same pattern later in the day. Repetition across small moments is often more practical than one long session.
Noise is a design issue, not a discipline issue. If the child strikes too hard, first change the surface or move outdoors. A folded blanket can make a dramatic difference. You can also model a softer tap by placing your hand close to the striking point and using a smaller movement.
The adult’s position matters. Sit close enough to block an unsafe swing and keep the sticks below face level. Do not encourage tapping near another child’s head, even as a joke. When several children play together, give each child enough space and use a clear turn-taking pattern.
Watch for signs that the instrument is not currently a good fit:
- The child repeatedly drops it because it is too heavy or long.
- The sound causes distress or the child covers their ears.
- The child is using it mainly to hit people or fragile objects.
- The child is chewing the ends rather than exploring the sound.
- The child becomes tired after only a few taps.
- The surface has developed a crack, rough patch, or loose finish.
In those cases, stop the activity and adapt the conditions. Use one stick, switch to a soft household object, lower the volume, or return to clapping and singing. Musical exploration does not depend on owning a particular product.
Care, Storage, and the End of the Toy’s Life
Wood is repairable in some circumstances, but it is not indestructible. Store rhythm sticks somewhere dry, away from radiators, standing water, and heavy objects that could bend or crush them. A small open basket is preferable to a damp, overcrowded container.
Wipe them clean rather than soaking them. If the maker provides care instructions, follow those instructions over general advice. Do not apply a new oil or wax simply because the surface looks dry; the existing finish and the child’s contact with the instrument both matter. If the coating is unknown, adding another product makes the material harder to assess.
When deciding whether a pair can be passed to another child, inspect the actual condition rather than relying on the fact that it is wooden. Reuse makes sense when the sticks remain smooth, solid, and cleanable. A pair with a split end or persistent roughness belongs outside the toy basket, regardless of how little it originally cost.
End-of-life claims also need to be specific. An unfinished wooden stick may be suitable for some forms of composting or disposal, depending on local conditions. A painted, glued, laminated, or heavily treated stick should not automatically go into a backyard compost pile. Nor should it be burned in a household stove unless the material and local rules make that appropriate. “Wooden” does not mean that every part of a finished product will break down in the same way.
The environmental case for wood is strongest when the product is durable, repairable, used by more than one child, and eventually disposed of responsibly. It is weaker when a cheaply made item cracks quickly or carries a complex coating that cannot be separated from the wood. Plastic has real disadvantages at the end of its life, but a material comparison without product-specific information can easily become marketing rather than analysis.
The same caution applies to price and lifespan. A more expensive set may offer better sanding, stronger construction, or clearer material information, but price alone does not prove quality. Look at the build and the care instructions. Buy the simplest pair that is appropriate for the child and the setting, not the set with the most ambitious claims on the package.
Rhythm sticks earn their place in a home because they make music tangible. A child can hold the instrument, change the force, wait for a response, and hear an immediate result. That is enough to support a rich set of activities: tapping names, counting blocks, copying patterns, marching through a pause, or comparing the sound of wood with the sound of a towel-covered box.
The useful specification remains modest: two well-made sticks, a safe surface, a nearby adult, and time to repeat the same small idea. Everything beyond that is optional. No app, subscription, battery, or promise of guaranteed developmental outcomes is required.