Wooden Toy Cleaning Mistakes That Ruin Natural Finishes
A wooden block arrives in a child’s hand as a small architectural object: sanded smooth, finished with a beeswax-and-oil blend or a plant-based stain, and prepared to withstand the spit-up and drool of early childhood.
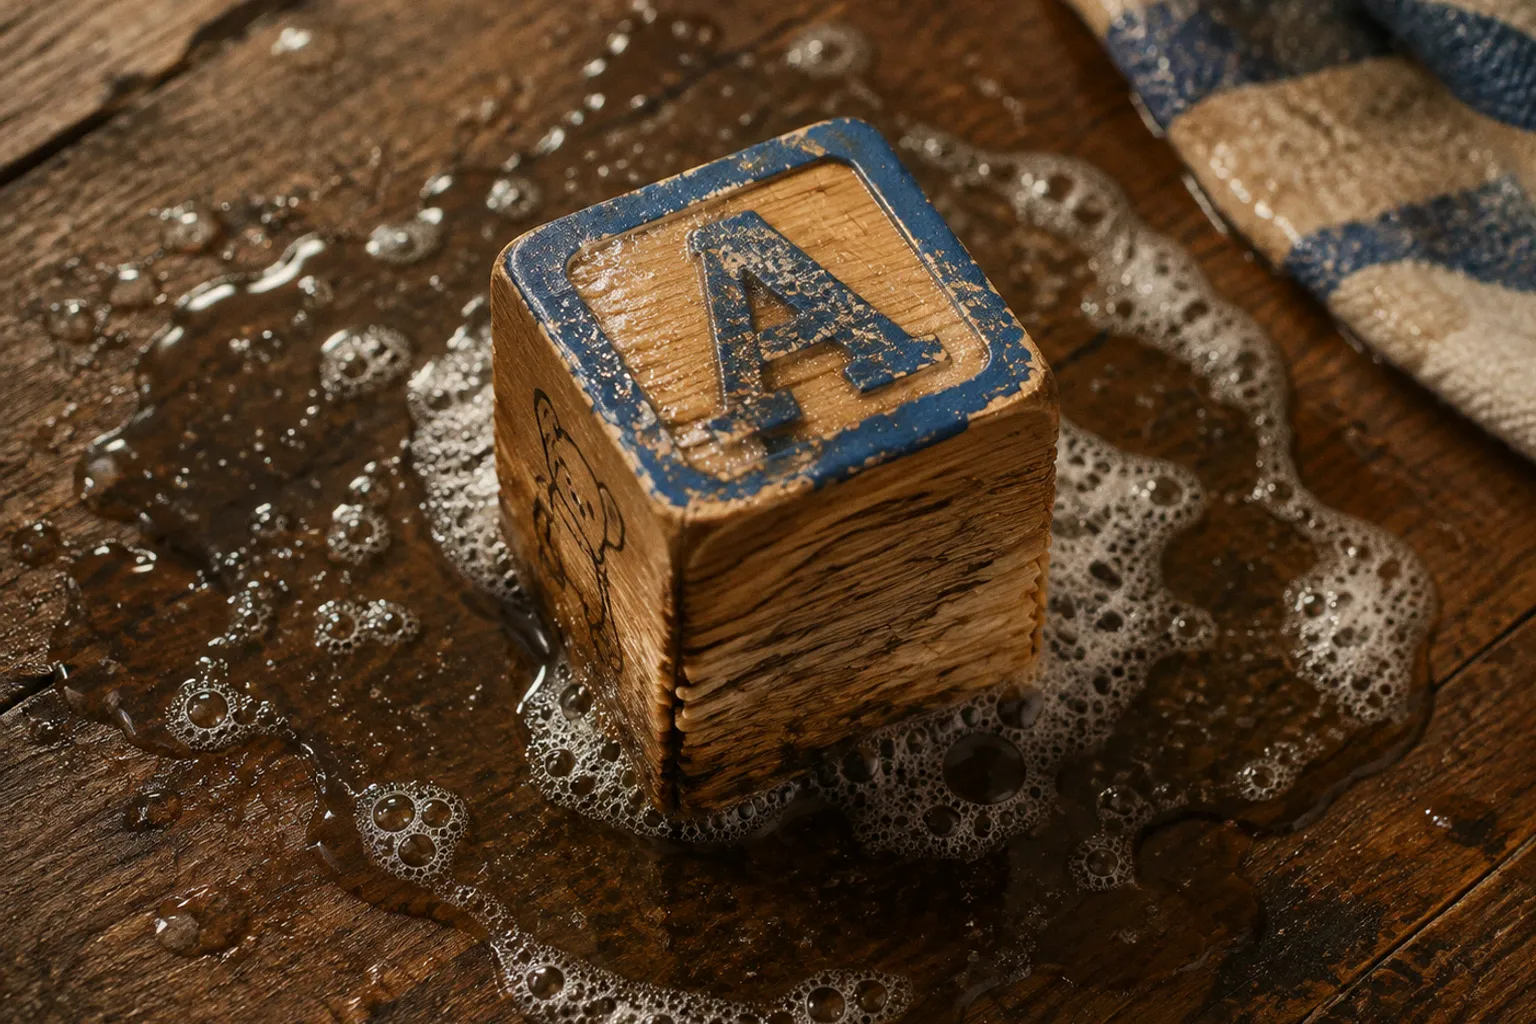
By the time it leaves the toy rotation, it has often been through at least one sanitization routine designed for plastic.
The surface looks dull. The edges feel fuzzy. The grain has lifted in places. Somewhere along the way, the finish — the part responsible for the toy’s tactile quality and resistance to everyday moisture — was chemically or mechanically worn away.
This is one of the most common failure points for natural-finished wooden toys, and it happens largely because parents borrow cleaning habits from the plastic-toy world. Harsh chemicals, soaking, steam, dishwashers, boiling water: these routines make sense for many non-porous synthetic materials. Applied to wood, they can swell the fibers, loosen joints, dissolve waxes, discolor paint, and leave the surface less protected than it was before cleaning.
A certified beech block with a food-contact-safe finish does not need the same treatment as a melamine plate. Wood is porous, responsive to humidity, and finished rather than hermetically sealed. Cleaning it well means working with those properties instead of trying to defeat them.
The important distinction is between removing dirt and attempting to sterilize a toy. Routine wiping can deal with saliva, dust, food residue, and the thin film that hands leave behind. A serious illness event is a different matter and may call for the manufacturer’s care instructions, a compatible disinfectant, or removing a porous toy from use altogether. The solution is not automatically more water or a stronger chemical.
The Hidden Dangers of Submerging and Steam Cleaning
Wood is hygroscopic, which means it exchanges moisture with the surrounding air. Drop a finished wooden block into a sink and water begins moving through the surface, especially along end grain, seams, holes, and areas where the finish has worn thin. An oil or wax finish slows that exchange; it does not make the wood waterproof.
Soaking overwhelms the protection.
The visible damage often appears in stages. The surface first loses its quiet sheen and turns matte. Then the grain rises, the edges feel rough, and small cracks may develop along the grain. Components joined from several pieces can move at different rates as they absorb water. Pegs, dowels, and fitted joints may swell, loosen, or become difficult to move. Painted details can bubble or flake when moisture gets beneath the coating.
The damage is not always dramatic at first. A block can look acceptable after drying and still have a finish that is now uneven and more vulnerable to the next spill. A hollow rattle or a toy with enclosed cavities is harder to assess because water can remain inside areas that are difficult to dry completely. A persistent musty smell, staining around a seam, or unexplained swelling is a reason to stop using the toy rather than keep washing it.
Dishwashers and steam sterilizers are particularly unforgiving. They combine prolonged moisture with heat, rapid changes in temperature, and strong water movement. That combination can soften wax, drive moisture into joinery, and cause the wood to expand and contract faster than the finish can accommodate. Laminated pieces may separate. Glued joints may weaken. Metal parts can corrode, while painted surfaces may lose their adhesion.
The problem is not that steam is inherently dirty or that hot water never cleans. The problem is that a wooden toy is a composite object: wood, finish, paint, glue, and sometimes metal hardware all respond differently to heat and moisture. A cycle that is harmless to a plastic teether can be destructive to a wooden puzzle.
A wooden toy is not a sealed plastic surface. Treating it like one can damage both the finish and the structure beneath it.
Drying can create a second round of damage. Placing a damp toy on a sunny windowsill or beside a radiator may remove surface water quickly, but the outer fibers can shrink while the interior is still damp. That uneven movement encourages checking, warping, and peeling. Direct heat can also soften some coatings and leave pale or glossy patches.
Wood prefers a slow, even dry at room temperature, with air moving around all sides. Stand pieces apart rather than stacking them while damp. Turn them occasionally. Do not put a wet toy straight into a sealed box or plastic bin, where residual moisture has nowhere to go.
What to do if a toy has already been soaked
Fixing water damaged wooden toys begins with restraint. Do not sand immediately, oil immediately, or force the piece back into shape while it is still wet.
1. Remove the toy from the water and wipe away surface moisture. Use a soft towel rather than rubbing aggressively.
2. Let it dry gradually. Keep it in a shaded, ventilated room away from radiators, heaters, and direct sun.
3. Inspect it only after it has stabilized. Look for raised grain, open joints, cracks, flaking paint, swelling, or a smell that does not disappear with drying.
4. Do not return it to a child’s mouth if the finish is peeling or the structure has changed. Loose paint, splinters, and weakened parts are safety problems, not cosmetic defects.
5. Restore only a sound surface. A light roughness may respond to very fine sanding and a compatible food-safe finish, but a split, warped, moldy, or structurally loose toy is usually better retired.
Oil cannot reverse severe swelling, and wax cannot repair a joint that has opened. Restoration is appropriate for superficial dryness and wear, not for every toy that has spent a night in the bath.
Why Harsh Chemicals Strip Protective Natural Finishes
The instinct to clean a child’s toy after heavy contamination is reasonable. The chemistry is where the trouble begins.
Natural finishes are not one single category. Drying oils such as linseed and tung oil react with oxygen over time and form a cured film within and near the surface of the wood. Some plant oils behave differently, and mineral oil is different again: it is a non-drying oil. It remains liquid and does not cure into a hard, flexible film in the way linseed or tung oil does. It can condition and lubricate a wooden surface, but it should not be described as a curing finish.
Wax topcoats provide another kind of protection. Beeswax and carnauba wax sit primarily at or near the surface, adding water resistance and a soft sheen. They can be softened or removed by heat, solvents, repeated alkaline washing, and aggressive scrubbing.
Harsh cleaners can therefore cause several types of damage:
- They alter or remove the finish. Strong alkaline products, solvents, oxidizers, and repeated exposure to alcohol can dull, soften, strip, or embrittle different coatings.
- They disturb the surface balance. Once a finish has been removed, the exposed fibers take up moisture more readily and become rougher with each cleaning cycle.
- They dissolve or weaken wax layers. A wax coat that disappears may leave the wood looking pale, dry, or patchy.
- They discolor stains and paint. Pigments and thin decorative layers can fade, lift, or become uneven when exposed to oxidizing or solvent-based products.
- They leave residues. Multi-surface sprays and furniture polishes may contain silicones, fragrances, or other ingredients that are not intended for a surface a child may mouth and can interfere with later refinishing.
Bleach deserves particular caution. It may be appropriate for some hard, non-porous surfaces when used according to its label, but a porous wooden toy is not automatically made safer by applying it. The product can damage the finish and may not be suitable for the specific paint, glue, or coating used by the manufacturer. The same principle applies to concentrated hydrogen peroxide, alcohol sprays, phenolic cleaners, and disinfectant wipes: compatibility matters, and a stronger product is not automatically a better one.
A stripped finish also changes how the toy behaves during the next spill. Bare or worn wood absorbs water and food residue more quickly, making it harder to wipe clean and more likely to develop raised grain. That is a maintenance problem even when no immediate safety issue is visible.
The safest way to clean wooden toys is therefore not to choose the most aggressive product available. It is to use the least aggressive method that matches the actual problem.
Understanding the Natural Antimicrobial Properties of Wood
Wood is not sterile, and “antimicrobial” should not be treated as a guarantee that a toy can clean itself. Different species, grain orientations, surface treatments, moisture levels, and organisms produce different outcomes. A smooth, well-maintained wooden surface may behave differently from a cracked, unfinished, or repeatedly soaked one.
What is useful to understand is that wood is not biologically equivalent to glass or plastic. Its porous structure can take up moisture, and some studies of wooden food-contact surfaces have found that certain bacteria do not persist on them as readily as they might on some non-porous materials. That does not mean every wooden toy kills pathogens, that all woods perform identically, or that a wooden surface can replace cleaning and hand hygiene.
The practical value lies in avoiding conditions that help contamination persist. A dry, intact, clean finish is easier to maintain than a surface covered in sticky residue, damaged by chemicals, or left damp inside a closed container. The finish slows moisture exchange and makes everyday wiping more predictable. Once the coating is stripped or the wood is cracked, those advantages become less dependable.
This is why the language of “natural sterilization” is misleading. A wooden toy can be hygienic enough for ordinary play without being sterile. Routine cleaning removes the material that microbes need in order to remain on the surface. Drying reduces lingering moisture. Inspecting the finish prevents a small maintenance problem from becoming a splinter or paint-flaking problem.
The distinction matters most after illness. Vinegar, soap, and water can remove residue, but they should not be presented as proven disinfectants for stomach viruses, respiratory viruses, or other illness pathogens. If a child has been sick, follow the toy maker’s instructions where available. For a non-porous part, a disinfectant approved for that surface may be suitable when used exactly as directed. For a porous, cracked, fabric-covered, or difficult-to-dry toy, taking it out of circulation may be the more responsible choice.
Wood is not sterile, but it is not just another plastic surface either. Its condition — clean, dry, and intact — determines how useful its natural properties remain.
Safe Sanitization Techniques Using Diluted Natural Solutions
For everyday care, the goal is simple: remove visible soil and organic residue while limiting the amount of moisture and chemical exposure.
Vinegar belongs in that conversation as a cleaner, not as a guaranteed disinfectant. Its acidity can help loosen mineral deposits and some household residues, and a diluted solution is often less aggressive than bleach or solvent-heavy sprays. But diluted vinegar has not been established as a reliable way to disinfect wooden toys after an illness event. A stronger vinegar mixture should not be treated as a substitute for a tested disinfectant.
Three low-impact approaches are useful for routine maintenance:
1. A barely damp cloth with diluted vinegar
For ordinary cleaning, a mild white-vinegar solution can be used on a compatible, intact finish. A commonly used household dilution is one part vinegar to ten parts water. Apply it to the cloth rather than pouring it onto the toy. Wring the cloth until it is barely damp, wipe the surface, and follow immediately with a dry cloth.
Do not use vinegar on every finish without checking. Acid-sensitive coatings, certain natural stones, some painted surfaces, and damaged finishes may react poorly. If the manufacturer gives different instructions, those instructions take priority. Test an inconspicuous area when the finish is unknown.
The important point is contact time. The surface should not remain visibly wet, and the toy should not be left sitting in the solution. Vinegar can help clean; it does not turn a porous wooden toy into a disinfected medical surface.
2. Diluted mild soap
A few drops of mild liquid soap in warm water are often sufficient for greasy fingerprints, food residue, or sticky marks. Use a soft cloth, not a saturated sponge. Wring it thoroughly, wipe the affected area, then remove any soap residue with a second barely damp cloth and dry immediately.
This method is particularly practical for toys that are handled frequently. Soap lifts oils and sugars so they can be removed from the surface. It should not be allowed to pool around joints, holes, or painted details.
3. Water alone for light soil
A barely damp cloth and immediate drying are enough for dust and light handling marks on a sound finish. This is often the best option for stacking blocks, puzzle pieces, wooden book covers, and other toys that have not been exposed to food or bodily fluids.
Water becomes a problem when it lingers, enters a cavity, or is applied repeatedly to a finish that is already failing. Small amounts used briefly are different from immersion.
What not to combine
Never mix vinegar with bleach or products containing bleach. The combination can release hazardous fumes. Do not add essential oils to a cleaning solution simply because they smell clean; fragrance does not establish disinfecting performance, and concentrated oils can irritate skin or become a concern for children who mouth the toy.
Avoid:
- bleach unless the manufacturer specifically confirms compatibility and the product label supports that use;
- alcohol sprays and solvent-heavy wipes on waxed or oil-finished wood;
- abrasive pads and melamine sponges, which can remove the finish by friction;
- boiling water, steam sterilizers, and dishwasher cycles;
- furniture polish or multi-purpose spray not intended for children’s products;
- soaking a toy in any solution, including a mild one.
For an illness event, natural household solutions should not be oversold. Cleaning and disinfecting are different tasks. If the toy cannot be cleaned and dried thoroughly, or if it has a porous surface that has absorbed bodily fluids, replacing it may be safer than trying to rescue it with increasingly harsh chemistry.
Restoring Dry or Rough Surfaces with Food-Safe Oils and Wax
Even with careful cleaning, a wooden toy eventually shows wear. The finish tends to thin first at high-touch points: the corners of a block, the handle of a rattle, the wheels of a push toy, or the area where a child repeatedly grips a puzzle piece.
A dull appearance alone does not always mean the wood needs oil. Sometimes it is simply surface residue. Clean the toy first, let it dry completely, and then assess the texture. If the surface feels dry, rough, or slightly pale but remains structurally sound, a compatible food-safe product may help.
Food-safe mineral oil
Food-safe mineral oil is widely used for wooden kitchen items because it is colorless, low-odor, and resistant to rancidity compared with many edible plant oils. It is a non-drying oil: it does not cure into a hard film like linseed or tung oil. Instead, it remains in the wood and can reduce the dry, thirsty feel of an unfinished or previously oiled surface.
Apply a small amount with a clean, soft cloth and work along the grain. Allow it time to penetrate according to the product instructions, then wipe and buff away all excess. The surface should feel conditioned, not greasy or wet.
Mineral oil is not automatically appropriate for every toy. It may not bond well with a cured varnish or a factory coating, and it will not repair peeling paint, deep cracks, or water-swollen joints. Test a hidden area first, particularly on a stained or painted toy.
Beeswax-and-oil blends
A beeswax blend adds a surface layer that mineral oil alone does not provide. It can soften the feel of a dry surface and offer some resistance to light moisture and handling. Commercial products are preferable when the finish is unknown because the ingredients and intended use are clearly stated.
Apply the balm thinly, allow it to set as directed, and buff thoroughly. A heavy layer creates a tacky surface that collects dust and can remain unpleasant for small hands. Wax is a maintenance coating, not a substitute for proper drying or a repair for structural damage.
Drying oils and existing finishes
If a toy was originally finished with a drying oil such as linseed or tung oil, the repair product should be compatible with that finish and clearly labeled for children’s or food-contact use. Drying oils cure through oxidation, so their behavior differs from mineral oil. They may require longer curing times and careful removal of excess product.
Do not assume that any bottle labeled “natural oil” is suitable. Some household oils are intended for cooking rather than finishing. Olive oil, for example, can remain oily and may become rancid over time. It can also darken light wood and leave an uneven result. A product made specifically for wooden toys or food-contact woodenware is easier to evaluate than a kitchen cupboard substitute.
A careful restoration sequence
1. Clean the toy with the least aggressive suitable method.
2. Let it dry fully in a ventilated room.
3. Inspect for splinters, cracks, loose parts, flaking paint, and signs of mold.
4. Test the chosen finish on an inconspicuous section.
5. Apply a very thin coat with a lint-free cloth.
6. Remove every visible trace of excess product.
7. Let the toy cure or settle for the full time stated by the manufacturer before returning it to play.
A refreshed surface should feel smooth and dry to the touch. If it remains sticky, smells strongly of oil, transfers residue to a cloth, or attracts dust, too much product was used or the finish is not compatible.
Restoration should return a sound toy to service, not disguise damage that makes the toy unsafe.
Typical Mistakes That Shorten a Wooden Toy’s Lifespan
The most damaging habits are not always the dramatic ones. A toy does not need to go through a dishwasher to deteriorate. Repeated small exposures can wear down a finish just as effectively.
- Storing toys in damp rooms or sealed plastic bins. Residual moisture becomes trapped when there is no airflow. A breathable material needs a chance to dry before storage.
- Leaving toys outdoors overnight. Dew, temperature changes, and direct morning sun create repeated wetting and drying that stresses natural finishes.
- Returning toys to a box while they are still damp. A dry-looking surface can conceal moisture around holes, seams, and undersides.
- Using furniture polish or multi-surface sprays. Silicone, fragrance, and solvent residues may not be suitable for a child’s toy and can interfere with later refinishing.
- Scrubbing stains with abrasive pads. Removing a mark by taking off the finish creates a larger maintenance problem than the original stain.
- Cleaning around loose paint instead of retiring the toy. Flaking paint and splintered edges can become ingestion or injury hazards.
- Assuming every crack is cosmetic. A superficial line may be manageable, but an open joint, sharp split, or movement between parts requires the toy to be set aside.
- Using a stronger mixture because the first wipe did not work. More concentrated vinegar, bleach, alcohol, or essential oils can damage the surface without providing reliable disinfection.
- Oil-treating a dirty or damp toy. Oil can trap residue and moisture beneath the new layer, making the finish cloudy or sticky.
The deeper logic is consistent: wood needs to dry gradually, remain reasonably clean, and be protected by a finish compatible with its use. Cleaning should preserve those conditions rather than erase them.
Building a Maintenance Routine That Actually Works
For a household with infants and toddlers, the useful routine is usually simpler than the one suggested by a cabinet full of sprays.
After ordinary play, remove visible crumbs and wipe off obvious marks. Toys that have been mouthed heavily or used during meals deserve attention before residue dries into seams and textured details. A barely damp cloth followed by immediate drying handles much of this work.
Once a toy has been cleaned, leave it where air can circulate around it. Do not stack damp blocks tightly together. Rotate toys with deep holes, enclosed chambers, or fabric elements so they can be inspected rather than forgotten at the bottom of a storage basket.
At regular intervals, examine the surfaces that receive the most contact:
- Are the edges still smooth?
- Is the paint lifting?
- Does the toy smell musty after drying?
- Has a joint become loose?
- Is the finish sticky, cracked, or visibly absent?
- Does the toy remain stable when handled?
Reapply a compatible oil or wax only when the surface needs it, not because the calendar says it is time. A toy with a sound cured coating may not benefit from repeated oiling. A toy treated with mineral oil may need occasional conditioning because mineral oil remains non-drying and can gradually wear away through handling and washing. The original manufacturer’s finish instructions are more useful than a universal annual schedule.
When a child has been ill, separate routine cleaning from disinfection. First remove soil. Then check whether the toy’s material and finish can tolerate an appropriate labeled disinfectant. Follow the product’s directions for dilution and contact time, and keep the toy away from children until it is fully dry and free of residue. If that process would require soaking a porous wooden toy or leaving liquid inside it, retirement may be the better decision.
Wooden toys are durable, but durability is not a promise that every piece can be saved indefinitely. A toy that is dry, intact, and well maintained can develop a pleasing patina rather than simply becoming shabby. A toy that has been repeatedly soaked, stripped, heated, and sealed while damp may become unsafe long before its shape disappears.
That is the real cost of the common wooden toy cleaning mistakes. They do not merely make a block look older. They remove the finish that makes the surface easier to maintain, weaken the structure that keeps the toy safe, and turn a repairable material into a difficult one.
The point of choosing wood is not to treat it as indestructible. It is to care for it as wood: wipe rather than soak, dry rather than heat, inspect rather than conceal, and restore only what is still sound. That approach protects the finish, preserves the tactile quality children notice first, and gives the toy a useful life that is determined by care rather than by a single panic-driven cleaning cycle.