Wooden play kitchen setup: maximizing space in small rooms
Every parent I work with eventually faces the same delightful problem: a child who has fallen head-over-heels for pretend cooking, and a home that wasn't quite designed for a full-scale restaurant.
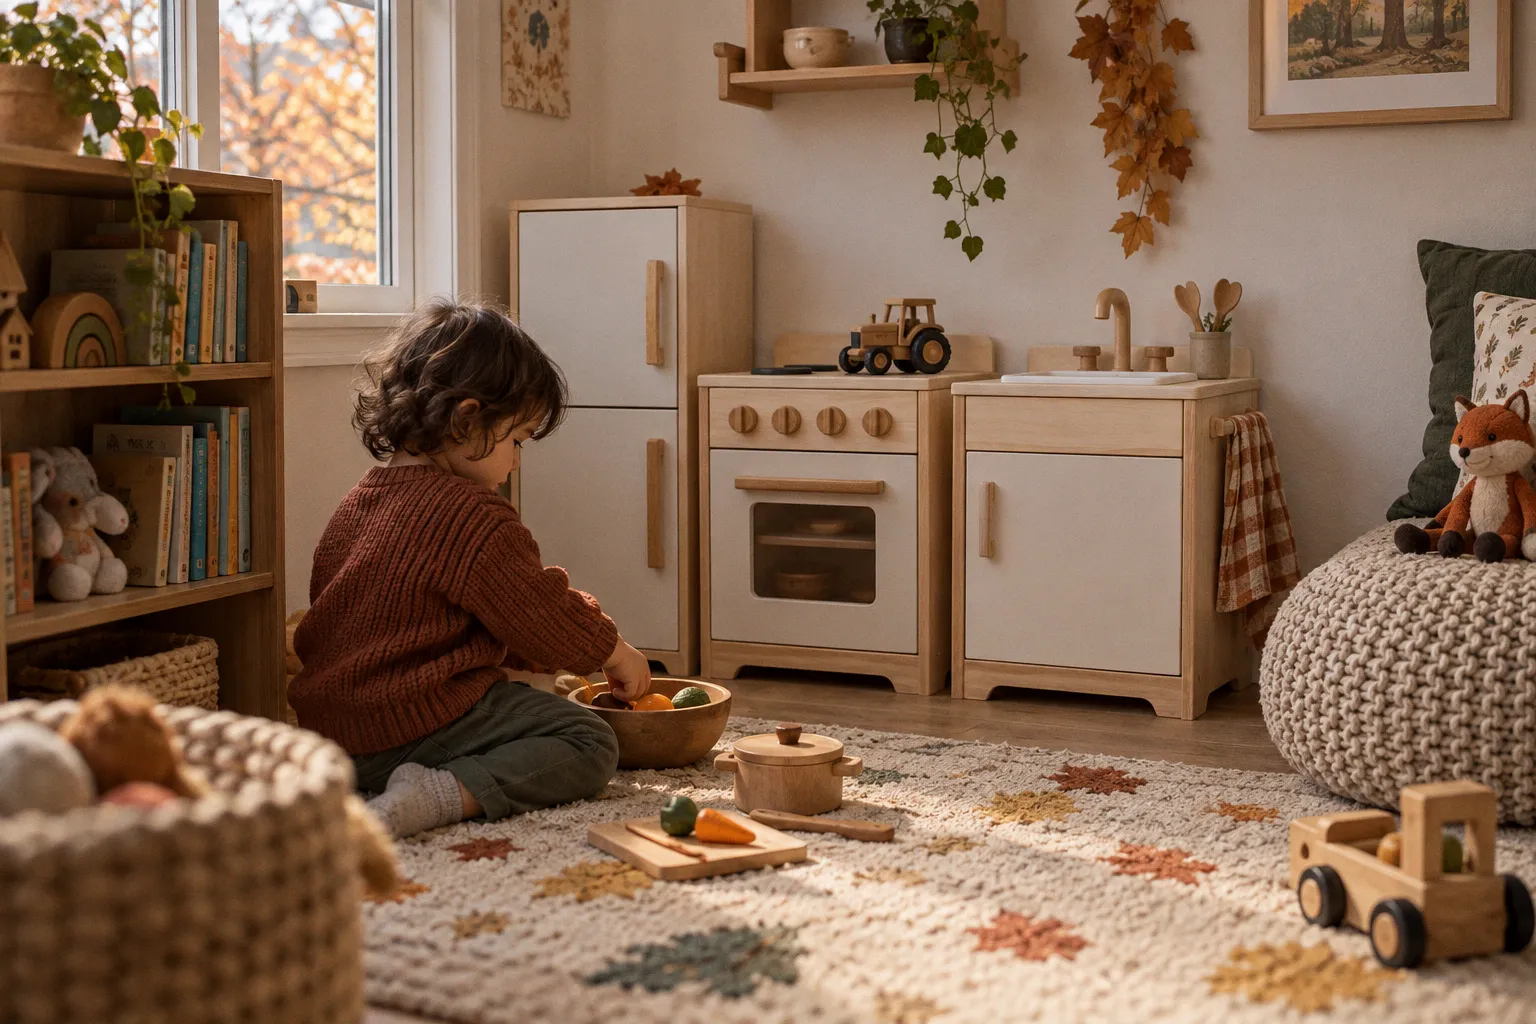
A small room doesn't have to be a small imagination
Wooden play kitchens are wonderful precisely because they invite such rich, open-ended roleplay — children stir, serve, negotiate menus, and practise the everyday language of family life. But a bulky unit can quickly dominate a small room, shove aside the reading corner, and turn tidy-up time into a daily uphill battle.
The good news is that a thoughtful wooden play kitchen setup for small spaces does far more than squeeze a toy into a tight floor plan. It treats the kitchen as a piece of functional furniture — measuring honestly, choosing a footprint that suits the room, and using the unit's own cabinets and shelves as part of your storage strategy. Here's how to set things up so the kitchen earns its place rather than overwhelming it.
The Geometry of Play: Measuring Your Space Before You Buy
Before falling in love with a particular model on a shop floor or a screen, the single most useful habit is the one play kitchen manufacturers themselves recommend: measure the intended spot first, with a tape, not just with your eyes. Children don't play where the kitchen "looks like it should fit" — they play where there is genuinely enough floor space to crouch, kneel, or stand side-by-side with a sibling or a parent during co-play. A unit that looks modest in a catalogue can crowd a small room the moment you add a couple of stools and a basket of play food.
When you're measuring, think in three layers, not just the footprint of the unit:
- Floor footprint — the rectangle the kitchen itself will occupy against the wall.
- Movement zone — at least 40–50 cm of clear floor in front of the stove and sink so a child can pull up a stool, crouch to "wash dishes," or pivot while carrying a wooden pot.
- Vertical reach — how high the tallest element (an overhead hood, a wall-mounted shelf above the unit) will come, especially relevant if the kitchen sits under a window, a shelf, or a low ceiling.
A helpful scaffolding trick is to mark the proposed footprint on the floor with masking tape before you commit. Children respond beautifully to this — they'll happily "test drive" the space, and you'll see immediately whether the play zone feels generous or cramped. If two children can't comfortably stand at the front without bumping hips, the kitchen is too wide for that wall.
Also note any door swings, radiator covers, and skirting boards that eat into usable wall length. A 90 cm kitchen pushed flush against a wall can leave only a few centimetres for the hinge side of a door — one of the most common, avoidable mistakes in small-room setups.
Measure with a tape, not with hope. The floor will tell you the truth long before the assembly instructions do.
Modular Magic: Separating Units for Flexible Room Layouts
One of the most useful developments in pretend play furniture is the rise of modular wooden play kitchens that separate into three independent units — typically a fridge, a stove, and a sink. Instead of one wide block demanding a single long stretch of wall, you can place each piece where the room actually allows: the sink under a window for good light, the stove against the most stable wall, the fridge tucked into a corner or beside a bookshelf.
This modular approach quietly does a lot of work in small rooms:
- It distributes weight and visual bulk, so no single wall feels overpowered by toy furniture.
- It follows the child's natural workflow — fridge for ingredients, stove for cooking, sink for washing — which mirrors real kitchens and supports sequencing and planning skills.
- It lets you scale the play environment as your child grows. A toddler might only use the stove and a single pan; a four-year-old might suddenly stage elaborate three-course meals and need all three units in active rotation.
In classroom settings, I've watched educators set up these modular kitchens along two adjoining walls in an L-shape, giving two children clear "workstations" without needing a wide run of cabinetry. The same idea works at home in a small bedroom or playroom corner.
A modular kitchen isn't three separate toys — it's one continuous roleplay world, gently broken apart so it fits the room you actually have.
When arranging the separated units, leave a small gap (roughly the width of a wooden plate) between them. Children use that gap as an imaginary "pass-through" — handing ingredients from fridge to stove — and it keeps each piece reading as part of a whole rather than three lonely boxes.
Tabletop Solutions: Ultra-Compact Designs for Minimalist Nurseries
For very tight rooms — a small nursery, a flat-share play corner, a child's bedroom already doing duty as a sleep space — a tabletop wooden play kitchen can be the most graceful answer. The smallest footprint commonly available in this category is around 35.5 cm wide, 16.5 cm deep, and 37 cm tall, weighing roughly 2.33 kg. That's small enough to live on a low shelf, a sturdy side table, or even a wide window ledge during the day, and to be tucked away on a higher shelf at night.
The trade-off is real: a tabletop kitchen won't hold a full pantry of play food, and it doesn't give children the same "stand-and-cook" proprioceptive feedback they get from a full-height unit. But for many families, the trade is worth it, because:
- It keeps pretend play available without claiming the floor, which is the single most contested resource in a small room.
- It can travel — onto the dining table for a shared family-cooking session, then back to the shelf.
- It introduces young toddlers to the rituals of roleplay without overwhelming a small body or a small room, which is wonderful scaffolding for emotional regulation: the child has a clearly bounded "cooking space" that ends when the play ends.
If you go this route, pair the kitchen with a low, washable mat that defines the play zone visually. Even a 60 x 60 cm square of soft flooring tells the child, "this is where the cooking happens," and it earns its keep by catching dropped wooden spoons, felt food, and the occasional tipped-over cup.
A quick comparison of footprint options
| Setup type | Approx. footprint | Best for | Trade-off |
|---|---|---|---|
| Full-size single unit | ~90–120 cm wide | Dedicated playrooms | Dominates small rooms |
| Modular 3-in-1 (separated) | Three smaller pieces, flexible placement | Small bedrooms, awkward corners | Requires more wall length overall |
| Tabletop / mini unit | ~35.5 x 16.5 cm | Nurseries, shared adult–child spaces | Limited storage for accessories |
| DIY custom build | ~36.5 inches wide × 38 inches tall | Parents comfortable with basic tools | Materials cost roughly $50–$100; time investment |
Hidden Storage Hacks: Using Play Kitchens to Organize Toy Clutter
Here's the part that genuinely delights the parents I work with: a wooden play kitchen is, structurally, a piece of furniture with closed doors, shelves, and built-in compartments. Used intentionally, it doubles as a tidy-up tool rather than a tidy-up problem. The closed cabinets and the inside of the oven door are perfect for stacking wooden play food in shallow trays, hanging small utensils on a peg rail, or hiding a rotation of "today's ingredients" so the kitchen doesn't become a dumping ground.
Shallow baskets inside the lower cabinet are a small but powerful scaffolding tool. Children as young as two can match a basket of "fruits" with a basket of "vegetables," and that sorting work quietly builds early categorisation and one-to-one correspondence skills. Putting a simple picture label on the front of each basket — a hand-drawn apple, a hand-drawn carrot — turns the cabinet into a literacy-rich environment without anyone needing to announce it as a lesson.
Don't overlook the vertical space above the kitchen either. A narrow shelf 30–40 cm above the unit can hold a few favourite picture cookbooks, a small jar of wooden utensils, or a basket of tea-time props. This is one of the most effective space-saving moves in a small room: you're using dead air above the kitchen instead of buying a separate storage unit.
A few common mistakes worth sidestepping:
- Overfilling the cabinets. When every shelf is jammed, children can't see what they have, so they pull everything out to find the one wooden lemon. Three visible items per shelf beat fifteen hidden ones.
- Storing non-kitchen toys inside. The moment the kitchen becomes a generic toy box, it loses its roleplay identity. Keep unrelated toys in their own homes.
- Forgetting to involve the child in the system. Co-play at tidy-up time — naming items as they go back, narrating the process — is how the storage habit actually sticks. Children take ownership of routines they've helped build.
Strategic Placement: Keeping Pretend Play Contained in Tight Quarters
Where the kitchen physically sits in the room matters as much as which model you choose. Pretend play in compact kitchen environments tends to stay tidier when the unit is anchored to one wall or one corner, ideally with a soft rug or mat defining the play zone in front. The kitchen becomes a destination rather than something a child walks past and pulls toys from in passing.
A few placement patterns that work well in small rooms:
- Corner placement with the stove and sink facing outward. This gives the child a clear "stage" and lets you see the play from the rest of the room — useful for stepping in for co-play without crowding.
- Along a wall opposite the bed or reading nook. This separates active play from quiet play, which helps with the transition between high-energy and calm activities throughout the day.
- Under a window. Natural light on the play food and the child's face makes the roleplay more inviting and reduces the need for an additional lamp in that corner.
Whichever spot you choose, leave a small "tool station" nearby — a low basket or a single shallow tray for the play food that's currently in rotation. Containment isn't about restricting play; it's about giving the child a clear edge to the imaginary world. A kitchen with a defined boundary is a kitchen that gets used deeply, then put away willingly.
Children return to kitchens that feel like a place. Defining the zone — with a rug, a wall, and a tidy storage rule — is what turns a piece of furniture into a place.
If you're renting or hesitant to commit, a freestanding modular kitchen (separated units) is easy to rearrange as your child's interests shift from "bakery" to "soup kitchen" to "restaurant." And if you're handy, a DIY build of roughly 36.5 inches wide by 38 inches tall can be tailored exactly to your wall, your child, and your storage needs for around $50–$100 in materials — a meaningful saving in exchange for a weekend's work.
Closing thoughts
A small room doesn't need a smaller imagination. What it needs is a wooden play kitchen that's been measured for, placed thoughtfully, and welcomed as both a roleplay stage and a piece of honest-to-goodness storage furniture. Measure twice. Choose modular or tabletop if the room is tight. Use the cabinets as a tidy-up tool, not a dumping ground. Anchor the kitchen to one wall, define the play zone with a rug, and step into the cooking whenever your child invites you in.
Done this way, the kitchen quietly stops being the thing that's "too big for the room" and becomes the room's most-used corner — the place where a small child can practise being big, day after day.