Wooden Toy Painting: Safe Step-by-Step Methods
Painting a wooden toy safely is not primarily a color-selection problem. It is a coating-system problem.
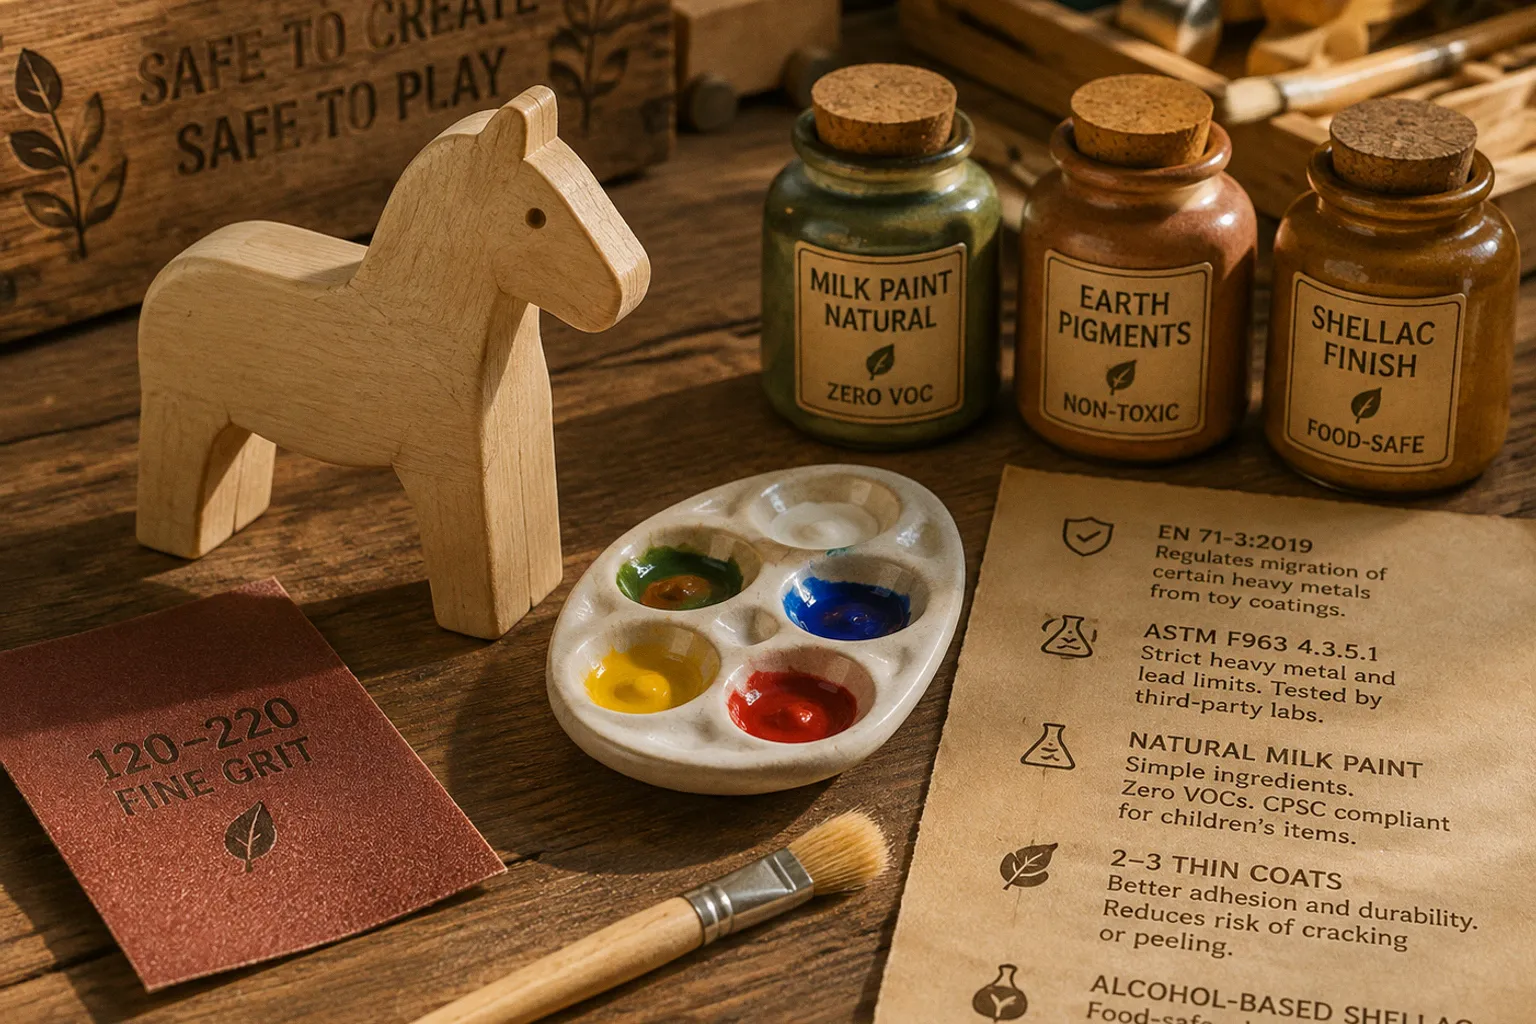
The wood surface, paint chemistry, layer thickness, drying conditions, and final seal all determine whether the finished object can tolerate handling, friction, and occasional mouthing without premature chipping.
For unfinished wooden toys, the correct process is sequential: select a coating with documented safety compliance, prepare the timber without creating splinters, remove all sanding dust, apply several thin layers, and allow the finish to dry and cure completely before use. A decorative result is insufficient if the coating has not been formulated or tested for contact with children.
The most reliable approach to non toxic paint for wooden toys application steps is therefore controlled rather than improvised. Each stage reduces a specific risk: rough wood creates mechanical injury, dust weakens adhesion, thick paint cracks, and an unsuitable topcoat can introduce a new chemical hazard after the color layer has dried.
Selecting Certified Non-Toxic Coatings for Children
The term non-toxic is not a complete safety specification. It may describe a product’s marketing position, its low-emission profile, or the absence of selected ingredients. It does not automatically confirm that the coating is suitable for a toy that a child may handle frequently or place in the mouth.
A child-safe coating should have documentation connected to recognized toy-safety requirements. Two standards are particularly relevant depending on the market:
- EN 71-3:2019 regulates the migration of certain heavy metal elements from toy materials and coatings. The standard includes limits for elements that could migrate from scraped-off toy coatings.
- ASTM F963, section 4.3.5.1 establishes restrictions for heavy metals and lead in paints and surface coatings used on children’s toys in the United States. Compliance is tested through laboratory procedures, including third-party evaluation.
These standards do not mean that every product described as water-based, natural, low-odor, or eco-friendly is automatically suitable. A water-based wall paint may have a favorable indoor-air profile while lacking the testing required for toy use. Similarly, an acrylic craft paint may dry quickly and appear smooth but still be unsuitable for a mouthing toy if the manufacturer provides no relevant compliance information.
What to look for on the product documentation
For a toy project, evaluate the coating as a technical material rather than as a color product. The label or technical documentation should provide clear information about:
- intended use on children’s toys or children’s products;
- compliance with EN 71-3, ASTM F963, or an equivalent applicable requirement;
- restrictions relating to heavy metals and lead;
- recommended substrates, including raw or previously finished wood;
- required drying and curing conditions;
- compatibility with the proposed topcoat;
- manufacturer identity and batch or product information.
A clear compliance statement is more meaningful than general phrases such as natural, non-toxic, or safe for the home. If the documentation does not identify the relevant testing or standard, the product should not be treated as verified for a toy that may be mouthed.
Natural milk paint is one possible option. Formulations based on milk protein, lime, and earth pigments can contain zero VOCs and may comply with CPSC standards for children’s items. However, the specific product still requires evaluation. A natural ingredient profile does not replace product-specific safety documentation, and zero VOCs does not describe every hazard associated with a coating.
For children’s toys, certification evidence has greater value than a reassuring ingredient label.
Paint selection by toy function
The intended use of the toy changes the required level of caution. A decorative wooden object placed on a shelf has a different exposure pattern from a teether, peg doll, stacking ring, or toy vehicle that is handled continuously.
| Toy use | Coating priority | Practical implication |
|---|---|---|
| Decorative display piece | Verified composition and stable adhesion | Mouthing resistance may be less central, but the coating should still be appropriate for children’s products if children can access it. |
| Frequently handled toy | Abrasion resistance and controlled curing | Thin layers and a compatible topcoat reduce rubbing and surface loss. |
| Toy likely to be mouthed | Toy-safety compliance, cured finish, and resistance to chipping | Avoid uncertified craft coatings and do not return the toy before full curing. |
| Older painted toy | Lead-risk assessment before restoration | Surface sanding can spread hazardous dust and does not make an unknown coating safe. |
The paint itself is only one component. The primer, color coats, and sealant must form a compatible system. If a topcoat softens the underlying paint, causes wrinkling, or remains tacky, the final surface is not suitable regardless of the original paint’s documentation.
Surface Preparation: Sanding and Dust Removal Techniques
Surface preparation has two objectives: reduce mechanical hazards and create a stable base for the coating. It does not make unsafe wood or unsafe paint chemically safe. Sanding removes rough fibers and splinters; it does not eliminate contaminants embedded in the material.
For raw wood, begin with a fine-grit abrasive in the range of 120 to 220 grit. The correct grit depends on the starting condition of the timber:
- Around 120 grit is useful when the surface has visible roughness, machining marks, or sharp transitions.
- Finer grits up to 220 can refine the surface before painting and reduce loose fibers.
- Excessively aggressive sanding can round edges, distort small details, and remove material unevenly from peg dolls or carved components.
Small wooden parts require controlled pressure. A rounded edge may be safer than a sharp one, but an unevenly sanded edge can also interfere with the fit of a puzzle, wheel, peg, or interlocking block. The objective is not to polish every surface until it is glass-like. The objective is to produce a smooth, structurally intact surface with no loose splinters.
A practical preparation sequence
1. Inspect the timber before sanding. Look for cracks, loose knots, open joints, and fragile projections. A coating cannot correct a structural defect that may detach during play.
2. Sand the broad surfaces. Use even strokes and avoid concentrating pressure in one area. On cylindrical pieces, rotate the part while sanding to maintain a consistent profile.
3. Treat edges and openings separately. Holes, slots, and recessed areas can retain sharp fibers. Folded abrasive paper or a fine sanding sponge provides better control than forcing a large sheet into a narrow opening.
4. Refine the surface with a finer grit. Move toward the finer end of the 120–220 range when the initial roughness has been removed.
5. Remove all dust. Wipe the surface with a clean, lint-free cloth. Dust remaining in pores or corners can reduce adhesion and create a gritty texture under the paint.
6. Allow the piece to stabilize if it was cleaned with moisture. Do not paint damp wood. Residual moisture can affect absorption, drying, and the appearance of the final layer.
Dust removal is a functional step, not a cosmetic preference. Particles trapped between wood and paint create weak points. During handling, those points may become localized chips. On a small toy, a single chip can expose a rough edge or give a child access to a loose fragment.
Avoid sanding unknown painted surfaces indoors. If an older toy was manufactured before 1978 in the United States, its paint may present a lead risk. The historical date is not proof that a particular toy contains lead, but it is a strong reason to stop before disturbing the coating and arrange appropriate testing or professional assessment.
The Art of Thin-Layer Application for Durability
The most common application error is using too much paint. A thick layer appears efficient because it covers the wood quickly. In practice, it often dries unevenly, retains moisture beneath the surface, and develops cracks or weak adhesion at edges.
Applying two to three thin coats generally produces better adhesion and durability than applying one thick coat. Thin layers also allow the painter to identify defects early. A raised fiber, dust particle, or small area of poor coverage can be corrected before the next coat rather than buried beneath a heavy film.
How to paint wooden toys safely
Use the following sequence for unfinished wooden components:
1. Separate the pieces where possible. If the toy contains removable parts, paint them individually. This prevents uncoated contact zones and reduces the risk of paint sealing moving parts together.
2. Protect the work area from dust. A clean, stable surface reduces contamination during drying. Do not paint beside active sanding or cutting operations.
3. Apply the first coat sparingly. Work the paint into the grain without flooding holes, joints, or recessed details. Coverage may be incomplete at this stage.
4. Maintain a consistent film thickness. Excess paint tends to collect at corners, around handles, and along the lower edge of a piece. These areas dry more slowly and are more likely to chip.
5. Let the coat dry according to the manufacturer’s conditions. Exact drying times vary with the product, temperature, humidity, ventilation, and wood porosity. Do not define readiness by surface appearance alone.
6. Inspect the dry layer. Remove isolated roughness or raised fibers with very light sanding if the product system permits it. Remove the resulting dust before continuing.
7. Apply the second coat. Build opacity gradually rather than correcting transparent areas with a heavy application.
8. Add a third coat only where the system requires it. Additional material is not automatically stronger. It must remain compatible with the curing behavior of the paint and the final sealant.
9. Allow complete drying and curing before sealing. A surface can feel dry while remaining chemically soft beneath the surface.
10. Apply the compatible topcoat in thin layers. Follow the same principle of controlled application and full curing.
This method is relevant to common projects such as painted wooden peg dolls, blocks, train components, and craft shapes. In a DIY painted wooden peg dolls process, the narrow neck, shoulder, and base deserve particular attention. Paint frequently accumulates where the body changes diameter. That excess can interfere with stacking, fitting, or stable standing, and it may form a brittle ridge that breaks during handling.
Brush control and coverage
A small, high-quality synthetic brush usually provides adequate control for toy-scale work. The brush should distribute paint rather than leave ridges. Overworking a partially dried layer can pull the coating away from the wood and create uneven texture.
For geometric wooden blocks, maintain clean boundaries by allowing one color to dry before applying an adjacent color. Masking may be useful, but adhesive tape can lift an incompletely cured layer. On rounded parts, rotate the component rather than repeatedly dragging the brush across a drying surface.
Do not use paint to conceal mechanical defects. If a crack remains visible after preparation, repair or discard the component according to its construction. Coating a loose fragment can temporarily hold it in place without providing reliable structural security.
Natural Sealing Methods for Mouthing Safety
A sealant can improve resistance to rubbing, moisture, and surface loss. It cannot convert an uncertified paint into a certified toy coating. The entire finish remains relevant: the underlying color layer, the topcoat, and the interaction between them.
For a child’s toy, the sealant should have documentation appropriate to the intended use. The word natural is not sufficient. Oils, waxes, varnishes, and shellac products vary substantially in composition and curing behavior. A food-contact claim may also apply only under specific conditions and does not necessarily establish compliance with toy-safety requirements.
Alcohol-based shellac is considered food-safe once fully cured and can be used to make color coatings on wooden items more resistant to rubbing or mouthing. The phrase fully cured is operationally important. Wet or partially cured finish should not come into contact with a child, even if the final cured product is suitable for the application.
Applying a natural sealant
A controlled sealing routine is as follows:
- Confirm that the paint is completely dry and compatible with the sealant.
- Apply a thin first coat rather than attempting to create maximum gloss or thickness immediately.
- Allow the coat to dry under the manufacturer’s specified conditions.
- Inspect for tackiness, softening, clouding, or lifting of the paint.
- Add the next coat only if the product system requires it.
- Allow the complete finish to cure before the toy is handled by a child.
- Test moving parts after curing so that the seal has not increased friction or blocked a joint.
Sealing painted wooden toys naturally requires restraint. A thick natural oil or wax layer may feel pleasant to the touch but may not provide the same abrasion resistance as a harder cured film. Conversely, a hard coating that is not properly bonded can chip in larger fragments. The correct selection depends on the paint system, the toy’s use, and the manufacturer’s documented instructions.
A topcoat is not a safety shortcut. It is the final component of a coating system that must already be appropriate for children’s products.
When a sealant is not necessary
Not every wooden toy requires a separate finish. Some certified toy paints are designed to function as the complete surface system. Adding an unverified sealant can create more uncertainty than it removes, particularly if the two materials are chemically incompatible.
A separate topcoat is more defensible when the manufacturer specifies it, when the toy experiences high friction, or when the painted surface requires additional protection against repeated rubbing. It is less defensible when the only reason is to compensate for an uncertified paint or insufficient curing time.
Identifying and Avoiding Lead Risks in Older Toys
Restoring an older wooden toy requires a different procedure from painting fresh, unfinished timber. The first question is not which color to apply. It is whether the existing coating can be safely disturbed.
Wooden toys manufactured before 1978 may contain lead-based paint. Scraping, dry sanding, or mechanically abrading that surface can generate contaminated dust and chips. The hazard is not removed by covering the old coating with new paint. It is also not removed by sanding until the surface appears smooth.
A risk-based restoration process includes:
1. Identify the approximate age and origin of the toy. Documentation may be incomplete, so treat uncertain age conservatively.
2. Inspect the existing finish without disturbing it. Note flaking, powdering, exposed wood, and areas where a child could already access loose paint.
3. Do not dry-sand an unknown historical coating. Dust control is difficult, particularly on small carved parts with many edges.
4. Arrange appropriate lead testing or professional evaluation. Testing is necessary before deciding whether restoration is reasonable.
5. Separate unsafe items from active play. A toy with loose or deteriorating paint should not remain available while its coating is being assessed.
6. Use a replacement strategy when the material cannot be verified. Discarding or retaining the object as an inaccessible display item may be safer than attempting a home restoration.
This issue is distinct from the selection of child safe paint for unfinished wood toys. Fresh raw wood removes the uncertainty associated with the existing coating, but it does not remove the need for verified paint and finish selection.
Common Application Errors
Most failures occur because the process is shortened at a stage that appears minor. The resulting problem may become visible only after repeated play.
Painting over dust
Dust produces weak adhesion and an uneven surface. Small particles can become abrasion points, while larger particles create raised defects that children can feel and potentially dislodge. Clean the workpiece and work area before every coat.
Applying one heavy coat
A thick coat can crack, wrinkle, or remain soft beneath a dry outer skin. It also builds up at edges and in recesses. Two or three thin coats provide more predictable film formation.
Using a product without toy-specific documentation
A product can be water-based, low-odor, or marketed for children’s rooms without being suitable for a mouthing toy. The relevant question is whether the coating has credible documentation for the intended application.
Sealing before the paint has cured
A topcoat applied too early can trap residual moisture or solvents. It may cause the color layer to soften, wrinkle, or detach. Surface dryness is not the same as complete curing.
Assuming sanding solves chemical safety
Sanding improves the physical surface. It does not neutralize heavy metals, remove every contaminant, or validate an unknown coating. This distinction is particularly important when restoring older toys.
Ignoring contact surfaces
The underside of a block, the inside of a peg hole, and the axle area of a wooden vehicle experience different mechanical forces from the visible face. Paint can change tolerances and increase friction. Mask or limit coating in functional contact zones when the toy’s design requires it.
A Controlled Workflow for a Finished Wooden Toy
The complete procedure can be reduced to a practical sequence without reducing the technical requirements:
1. Choose the coating system. Confirm toy-use documentation for the paint and any sealant. Avoid relying on generic craft-paint descriptions.
2. Assess the wood. Reject or repair pieces with cracks, loose joints, unstable knots, or detachable details.
3. Sand the raw surface. Use approximately 120–220 grit abrasive, working until roughness and splinters are removed.
4. Remove dust completely. Use a clean lint-free cloth and keep the piece away from further sanding debris.
5. Apply the first thin coat. Avoid flooding edges, holes, and contact surfaces.
6. Dry and inspect. Correct raised fibers or surface defects only when compatible with the product instructions.
7. Build coverage with a second and, if needed, third thin coat. Do not compensate for poor coverage by applying a heavy layer.
8. Allow full drying and curing. Follow product-specific conditions rather than relying only on touch.
9. Apply a compatible child-appropriate sealant if required. Use thin layers and inspect for interaction with the paint.
10. Conduct a final mechanical inspection. Check for chips, tackiness, sharp edges, blocked joints, and loose components.
11. Remove the toy from use if the coating deteriorates. Peeling, flaking, or persistent softness indicates that the finish is not performing as required.
This sequence supports both safety and developmental function. A toy used for stacking, fitting, grasping, or rotational play depends on predictable dimensions and surface friction. Excess paint can alter those parameters. A rough or peeling finish can also shift the child’s interaction from constructive manipulation toward picking at the surface, which is an avoidable exposure route.
Final Assessment
Safe painting of wooden toys depends on material verification and process control. Select a coating with documented compliance, prepare raw timber with fine-grit sanding, remove dust, apply two to three thin layers, and use only a compatible sealant that has fully dried and cured. Treat older painted toys as a separate risk category, particularly when they may date from before 1978.
The definitive standard is not whether the toy looks finished. It is whether the complete surface system remains stable under the toy’s actual use: grasping, rubbing, stacking, rolling, and possible mouthing. For children’s wooden products, a restrained application with verified materials is more reliable than an attractive finish built from unverified paint and excessive coating thickness.