Handcrafted wooden toy restoration: a step-by-step guide
Handcrafted wooden toy restoration is not simply a matter of sanding away scratches and applying a fresh coat of varnish.
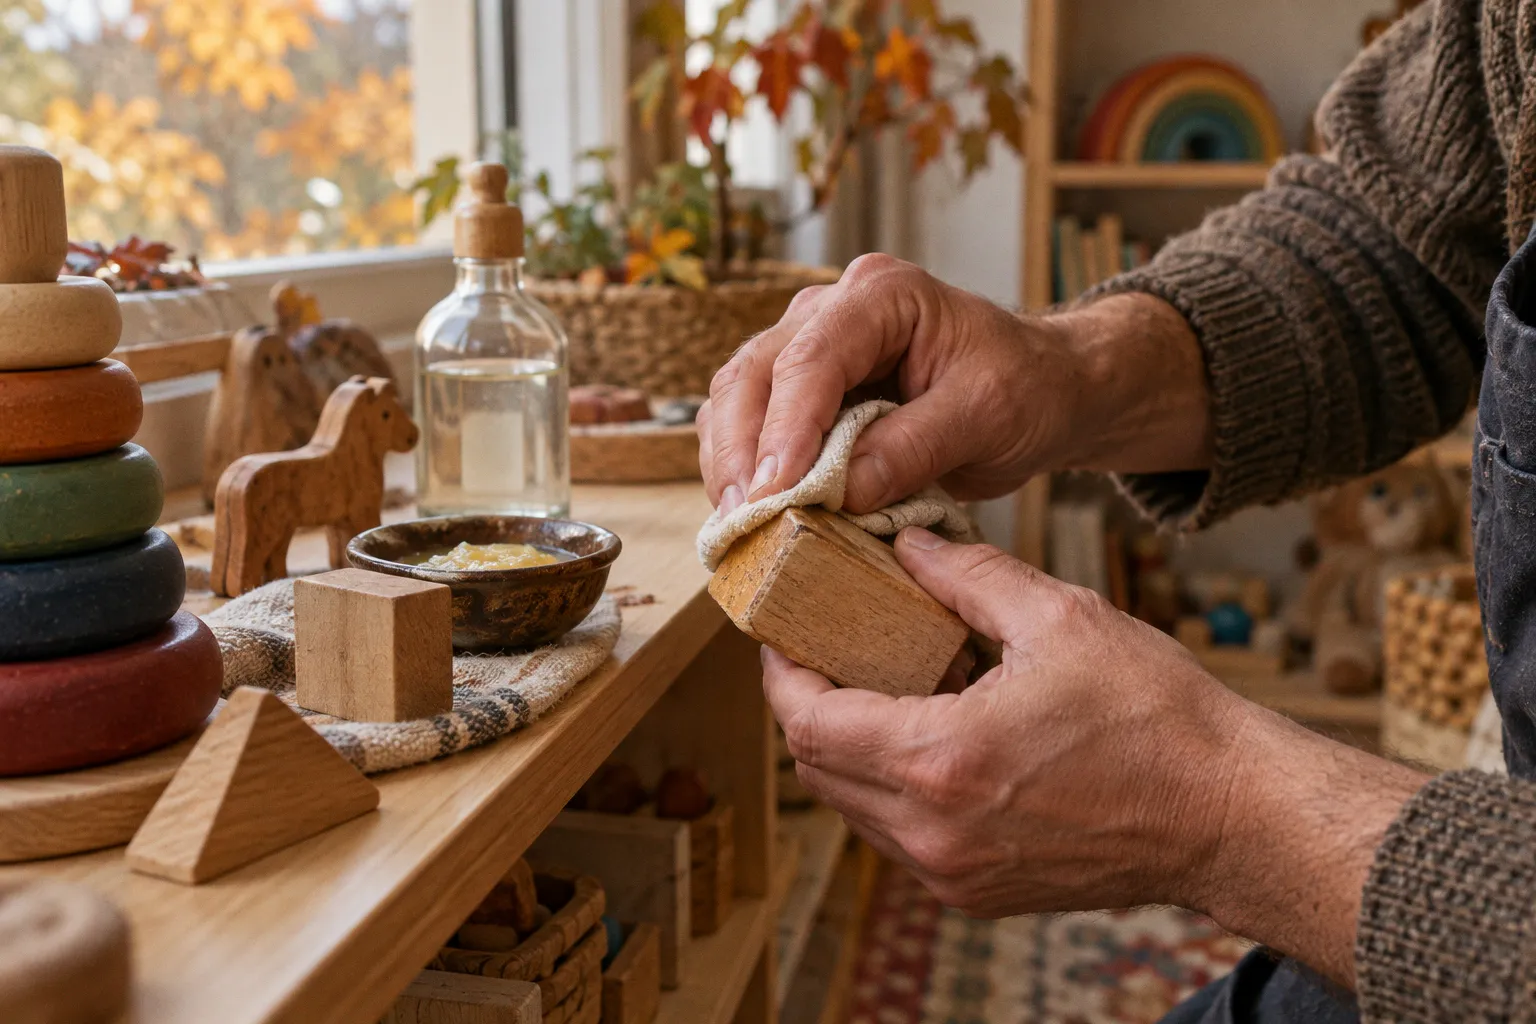
A wooden train, stacking set, pull toy, or carved animal can carry hidden risks: unstable joints, splintered edges, moisture damage, and—on older painted toys—potential lead-based coatings.
The safest restoration begins with restraint. Do not soak the toy. Do not sand an unknown vintage finish aggressively. Do not seal loose parts beneath a beautiful new surface and call the work complete. The aim is to preserve tactile integrity while returning the toy to a condition suitable for play: smooth, structurally sound, clean, and finished with materials appropriate for children.
These handcrafted wooden toy restoration steps provide a practical sequence for assessing, cleaning, repairing, sanding, refinishing, and storing heirloom wooden toys.
1. Assess safety and structural integrity before you begin
Before reaching for sandpaper, inspect the toy as if you were evaluating it on a factory floor rather than admiring it on a shelf. A handcrafted object may be attractive and historically interesting while still being unsuitable for a child’s hands.
Start with a dry visual inspection under good light. Look for:
- Splits running across the grain, especially around wheels, axles, handles, and thin projections.
- Loose knobs, beads, wheels, pegs, or pull cords.
- Sharp corners created by impact damage or failed repairs.
- Deep gouges that expose rough, raised fibers.
- Soft, crumbly, or darkened areas that may indicate serious moisture damage.
- Flaking paint, powdery pigment, or layers that lift when touched.
- Missing components that could create a choking hazard or change the toy’s balance.
- Rusted metal fittings, exposed nails, staples, or screws with sharp edges.
- Odors suggesting damp storage, mildew, solvents, or old chemical finishes.
A toy intended for toddlers deserves a stricter standard than a decorative object intended for display. Small detachable pieces, fragile painted details, and thin broken elements should not be treated as minor cosmetic defects. If a repair cannot withstand ordinary handling, mouthing, pulling, and repeated movement, it is not a finished repair.
Check the age and finish before sanding
Vintage wooden toys require particular caution. If the toy may have been painted before 1978, avoid standard sanding until the coating has been assessed for lead. Sanding can turn a stable painted surface into airborne dust and can spread contaminated debris across the work area.
Do not dry-sand an old painted toy simply because the finish is chipped. Use an appropriate lead test method or consult a qualified restoration professional when the age or coating is uncertain. If lead is detected, or if the finish cannot be safely identified, the toy may be better treated as a collectible rather than returned to active children’s play.
This is one of the points at which restoration has to be less romantic and more responsible. Preserving an original finish is not automatically virtuous if that finish compromises safety.
The first restoration decision is not which finish to apply. It is whether the toy should return to play at all.
Decide what should remain original
A common mistake in refinishing heirloom wooden toys is to erase every mark of use. Small dents, softened edges, and faded color may be part of the object’s material history. They are not necessarily failures.
Preserve original paint and surface character when the coating is stable, non-powdery, and safe. Remove or repair only what threatens handling safety, structural stability, or hygiene. A complete cosmetic reset can reduce the toy’s authenticity while adding new materials that were never needed.
By contrast, loose paint, splinters, exposed rough grain, and unstable joints should not be preserved for the sake of age. The boundary is practical: keep evidence of use, eliminate hazards.
2. Clean and sanitize without damaging the wood
Wood is porous, and that porosity is part of its appeal. It gives a toy warmth, tactile variation, and a surface that changes subtly with age. It also means that water and aggressive chemicals can move deeper into the material than they would on plastic or sealed metal.
Never submerge or soak a wooden toy. Water can enter end grain and joints, causing swelling, warping, finish failure, and structural cracking as the wood later dries. A toy that looks clean after soaking may become unstable days later.
A controlled cleaning method
Use a soft, barely damp cloth to remove surface dirt. Work in small areas rather than saturating the entire toy. For grooves, carved details, and wheel housings, use a soft brush that will not abrade the finish.
For light sanitizing, a diluted white vinegar or apple cider vinegar solution can be prepared at a ratio of one part vinegar to four parts water. Apply it sparingly to a cloth rather than pouring it onto the toy. Wipe the surface, then remove residual moisture with a clean, dry cloth.
The solution is intended for controlled surface cleaning, not immersion. It should not be treated as a universal disinfectant for every contamination problem, nor as a substitute for discarding a toy affected by mold or deep biological contamination.
Allow the toy to dry naturally in a ventilated room away from direct heat. Do not place it on a radiator, under a heat lamp, or in intense sunlight. Rapid drying can stress joints and encourage cracking, particularly in thin components and older dry wood.
What not to use
Avoid methods that trade short-term convenience for material damage:
- Do not put wooden toys in a dishwasher.
- Do not use bleach or harsh household disinfectants on unfinished or lightly finished wood.
- Do not flood carved details or wheel assemblies with liquid.
- Do not use abrasive sponges that flatten original tool marks and soften crisp edges.
- Do not combine cleaning chemicals.
- Do not seal dirt, grease, or moisture beneath a new oil or varnish layer.
If the toy has a persistent odor, visible mold, or deep contamination, surface wiping may not be enough. A porous object that cannot be cleaned reliably should not be returned to a small child.
3. Repair the structure before sanding the surface
Sanding is often the most visible part of restoration, but it should not be the first repair operation. If a handle is loose or a body panel is separating, sanding around the defect only makes the surface look orderly while leaving the toy mechanically weak.
Test each joint gently. Do not twist parts forcefully; older wood can fail suddenly at weakened grain lines. Identify whether the problem is a loose joint, a split component, missing material, or a failed previous adhesive repair.
Choosing a child-appropriate adhesive
For a structural repair, select a wood adhesive that is explicitly labeled non-toxic when cured and appropriate for the intended use. The product should be compatible with the wood species and the joint design. Follow the manufacturer’s instructions for application, clamping, and curing.
A suitable adhesive is not enough on its own. The joint must fit correctly, and excess glue must be removed before it hardens. Dried adhesive ridges can create hard bumps that are uncomfortable in the hand and difficult to sand flush without removing surrounding wood.
Keep glue away from moving parts. Wheels, axles, hinges, and rotating beads need clearance. A repair that locks a moving feature in place may be structurally strong but functionally wrong.
A practical repair sequence
1. Separate only what needs repair. Avoid dismantling a stable toy simply because it would make sanding easier.
2. Dry-fit the parts. Check that the pieces meet without forcing them into a distorted position.
3. Remove failed adhesive carefully. Scrape or lift loose residue without enlarging the joint unnecessarily.
4. Apply a controlled amount of adhesive. More glue does not create a stronger repair; it usually creates more cleanup.
5. Clamp or support the joint evenly. Pressure should hold the parts together without crushing soft wood or shifting alignment.
6. Remove squeeze-out while it is manageable. Keep adhesive out of grooves, axle channels, and textured surfaces.
7. Allow the repair to cure according to the product instructions. Do not rush to sanding or play testing while the joint is still green.
8. Test the repaired area by hand. Look for movement, cracking, or separation before applying a finish.
For a missing structural section, a replacement piece may be safer than filling a deep void with adhesive or putty. The replacement should be securely attached, smoothly shaped, and free from small detachable fragments. If the damaged area affects a load-bearing handle, wheel assembly, or thin neck, professional repair may be more responsible than an improvised patch.
4. Sand wooden toys progressively, not aggressively
Sanding wooden toys for toddlers requires a different mindset from preparing furniture. A furniture surface may be judged by visual smoothness. A child’s toy must also feel safe at every angle, including edges, holes, handles, and areas that will be repeatedly gripped.
The objective is not to remove as much wood as possible. It is to eliminate splinters, raised fibers, sharp transitions, and unstable surface material while retaining the toy’s proportions and tactile character.
Before sanding, clean away loose dust and confirm that any suspect old paint has been assessed. Never use ordinary sanding as a shortcut around lead-paint concerns.
The progressive sanding sequence
For general refinishing, begin with 150-grit sandpaper when the surface needs initial smoothing or edge rounding. Use controlled hand pressure and follow the existing contours. On detailed carved toys, sanding blocks may remove too much material from raised features, so folded paper or small flexible pads can provide better control.
Move to 180- or 220-grit paper for light refinement. This stage removes the deeper scratches left by the initial pass and evens out repaired areas. Finish with 320-grit paper before applying a new protective treatment. The finer abrasive creates a smoother tactile surface without polishing the wood so aggressively that a finish struggles to bond.
| Restoration stage | Typical abrasive | Purpose |
|---|---|---|
| Initial smoothing | 150 grit | Reduce rough fibers, soften damaged edges, and level minor surface irregularities |
| Surface refinement | 180–220 grit | Blend repaired areas and remove deeper sanding marks |
| Final preparation | 320 grit | Produce a smooth, refined surface before applying oil, wax, or another compatible finish |
Sand with the grain whenever the shape allows. Cross-grain scratches become more visible under clear finishes and can create a rougher feel than the unfinished surface suggested.
Pay attention to edges and end grain
Edges deserve careful attention because they receive concentrated handling and can become sharp after impact. Round them lightly rather than flattening or dramatically reshaping them. A toy should remain recognizable and proportionally balanced after restoration.
End grain absorbs finishes quickly and can feel rough even after the broad face of a component is smooth. Work gradually and inspect by touch. Run clean fingertips over the surface only after removing sanding dust; otherwise, particles can disguise raised fibers.
Do not rely on visual inspection alone. Hold the toy in different directions, rotate it under light, and feel around every opening and joint. A small splinter hidden inside a wheel well can matter more than a visible shallow scratch on the main body.
Good sanding preserves the toy’s shape while removing the hazards that shape has accumulated.
Avoid over-sanding
Over-sanding can erase hand-cut details, enlarge holes, weaken thin walls, and alter the fit of moving components. On a wooden building block, it may soften the geometry. On a carved animal, it may remove facial features. On a train set, it can change the profile of wheels or reduce the depth needed for a secure axle.
Stop when the defect has been controlled. Restoration is not an invitation to manufacture a new toy from an old one.
After sanding, remove dust with a soft brush and a dry or barely damp cloth appropriate to the surface. Let the toy dry fully before applying any oil, wax, paint, or other coating. Dust trapped under a finish compromises both appearance and tactile quality.
5. Repair chipped paint with restraint
Repairing chipped wooden toy paint is more complicated than matching a color. Old paint may contain unknown pigments or binders, and a new coating can trap unstable layers beneath it. Before adding paint, determine whether the original surface is secure and whether the toy is suitable for continued handling.
If paint is flaking, powdery, or lifting around an entire area, do not simply brush over it. New paint will not stabilize a weak substrate. Loose material must be addressed using a method appropriate to the toy’s age, coating, and safety status. On a vintage toy with possible pre-1978 paint, sanding or scraping may create a hazardous dust problem.
For a modern toy with a known, stable finish, small losses can sometimes be touched up with a coating specifically identified by its manufacturer as suitable for children’s products and safe once fully cured. The color match is secondary to adhesion, durability, and the absence of hazardous ingredients.
Avoid decorative touch-ups in areas where a child’s mouth or hands will repeatedly contact the surface unless the coating is clearly appropriate for that use. Follow the manufacturer’s curing instructions rather than assuming that a paint feels dry means it is ready for play.
A patch that remains tacky, transfers color, or develops a strong odor has no place in a child’s playroom.
6. Apply a non-toxic protective barrier
Once the wood is clean, repaired, smooth, and completely dry, choose a finish based on the toy’s intended use and the condition of the wood. The phrase non-toxic finish for restored toys is useful only when it refers to a real product specification, not a vague marketing label.
Look for clear information about:
- Ingredients or finish type.
- Safety once fully cured.
- Intended use on children’s products, toys, or food-contact surfaces where relevant.
- Application instructions and recoat requirements.
- Curing conditions and handling restrictions.
- Whether the finish is suitable for previously painted or oiled wood.
Food-safe mineral oil can recondition dried-out wood grain and provide a simple, non-toxic moisture barrier. A natural beeswax polish can offer additional surface conditioning. These treatments preserve a more natural, tactile appearance than a heavy film finish, although they may require periodic renewal and may not provide the same resistance to abrasion or moisture as a properly selected cured coating.
Apply oil or wax sparingly. Flooding the surface can leave a greasy residue, delay drying, and attract dust. Work it into the grain, allow the material to sit only as directed, and remove excess thoroughly. A child’s hands should not come away oily after handling the toy.
For painted toys or toys requiring stronger surface protection, use a product whose safety and curing specifications are clear. Do not infer safety from words such as natural, plant-based, organic, or eco-friendly. A natural ingredient can still be unsuitable for a child’s toy, and a green-colored label says nothing about durability, off-gassing, or cured-film performance.
Let the finish cure completely
Curing is not the same as surface drying. A finish may feel dry while remaining chemically active or mechanically soft beneath the surface. Keep the toy away from children until the product’s stated curing period has passed and the surface is no longer tacky, odorous, or easily marked.
Do not combine oil, wax, paint, and varnish systems casually. Incompatible layers can wrinkle, remain soft, peel, or trap odors. If the existing finish is unknown, a small test area on an inconspicuous surface can reveal basic compatibility, but it does not replace the manufacturer’s guidance.
After curing, inspect the toy again:
1. Confirm that the surface feels smooth in every direction.
2. Check that no finish has pooled in holes, grooves, or wheel channels.
3. Look for sticky areas, cloudy patches, or lifted edges.
4. Test moving parts for free and safe operation.
5. Check that repaired joints remain aligned.
6. Wipe the toy with a clean cloth to confirm that no residue transfers.
7. Control the environment after restoration
Wood continues to respond to its surroundings after the restoration is complete. It takes in and releases moisture, expanding and contracting across the grain. A toy stored beside a radiator, in a damp basement, or in direct sunlight is more likely to develop finish failure, cracks, or dimensional changes.
For long-term stability, keep indoor relative humidity between 40% and 60%. This range helps reduce the repeated moisture swings that stress wooden components and joints.
Store restored wooden toys:
- Away from radiators, heating vents, and fireplaces.
- Out of direct, prolonged sunlight.
- In a dry, ventilated room rather than a sealed plastic container.
- With heavy toys supported so thin parts are not under constant pressure.
- Without tightly compressing painted or finished surfaces together.
- In a place where small detached pieces can be monitored rather than lost.
Do not return a restored toy to a damp storage environment simply because the surface now looks protected. Oil and wax are moisture barriers, not waterproof armor. A finish cannot compensate for poor storage conditions indefinitely.
Inspect the toy periodically, especially before giving it to a younger child. Look for new movement in joints, raised fibers, finish breakdown, changes in odor, or small components that have loosened through use. Heirloom toys are not maintenance-free objects. Their longevity depends on small, repeated interventions made before damage becomes structural.
Common restoration mistakes
The same errors appear repeatedly in DIY wooden toy restoration because they prioritize speed or appearance over material behavior.
Soaking the toy to remove grime
Water penetrates wood, joints, and end grain. The immediate result may look clean, but swelling and cracking can follow as the toy dries. Controlled wiping is slower and safer.
Sanding before checking the paint
Unknown vintage coatings should not be treated as ordinary decorative paint. If a toy may predate 1978, assess the finish before creating dust.
Using a harsh disinfectant
Bleach and aggressive cleaners can damage finishes, discolor wood, and leave residues that are inappropriate for children’s products. A mild, controlled vinegar solution can be used for surface sanitizing when applied sparingly, but severely contaminated toys may not be salvageable through household cleaning.
Applying too much glue
Excess adhesive is difficult to remove from carved surfaces and moving parts. It can create hard ridges, lock mechanisms, and interfere with finishing.
Treating a cosmetic repair as a structural repair
A filler, paint layer, or thick finish can hide a crack without restoring strength. Test the joint mechanically before making it look finished.
Assuming “natural” means safe
Beeswax, plant oils, and natural pigments each have specific properties. Their origin does not automatically establish suitability for children’s use. Safety depends on the formulation, intended application, and full curing behavior.
Refinishing every surface
A stable original finish may be worth preserving. Removing it can erase craftsmanship, reduce the toy’s identity, and expose the wood to unnecessary abrasion. Restoration should solve a problem, not create a cleaner-looking version of one.
The long-term value of a carefully restored toy
The best handcrafted wooden toy restoration does not make an old object look factory-new. It returns the toy to a stable, usable condition while respecting the material decisions built into it: the grain direction, the weight of the timber, the softened edges made by years of handling, and the evidence of handwork that mass production rarely reproduces.
That requires a clear hierarchy. Safety comes before originality. Structural integrity comes before color matching. Tactile quality comes before gloss. And material honesty comes before green marketing.
A wooden toy should be repairable, inspectable, and durable enough to remain in circulation rather than moving quickly from playroom to waste stream. When its coating is appropriate, its joints are sound, and its storage environment is controlled, restoration can extend the useful life of a well-made object for years.
The final test is simple but demanding: the toy should feel solid, smooth, dry, and dependable in the hands of a child. If the restoration cannot meet that standard, preserving the object as a display piece is the more responsible choice.